Showing posts with label School. Show all posts

Thursday, June 20, 2013

Quick and Easy Rewards Chart

I am pleased to announce that I am done with school for the semester! Only two classes left until I finally get my degree.

That being said, I apologize for the lack of posts on here lately. After school wrapped up for the year, I went a little craft mad. I currently have eight new projects to share with you. It's just a matter of getting the posts typed up. Without further ado, here is one of them.

Making a Quick and Easy Rewards Chart

I found a really cute idea for rewards on Pinterest that was designed for a classroom.The basic premise was to have a reward for the class, which would be earned over time. The students would earn letters, which they could affix to the chart to spell out the name of their reward. Check out the original post on An Educator's Life here.

Okay, so I don't have a full class. I have one almost first-grader and a three-year-old, but I loved the idea. Not wanting to spend any money on a rewards chart that might not work, I got out the paper and markers to make a super cheap version.

Materials (per chart)

  • 1 12 x 18" sheet of paper
  • 4 sheets lined paper (or graph or copy)
  • 1 permanent marker
  • glue stick
  • colored markers

1. Brainstorm reward ideas. 

You'll need about 15-18 per chart. We came up with some pretty neat ideas.

Educational Outings: Science Museum, Art Museum, Children's Museum, Zoo,  Airplane Park, Nature Park, Botanical Gardens
Free But Fun: chair tent in the living room, playtime on the top bunk (which is still off-limits until the little one is a bit older), Rose Garden
Parties: tea party, painting party
Treats: favorite fast food, smoothie date, sushi dinner, apple pie, cheesecake
New Stuff: outfit, shoes, sketchbook, Matchbox Car, playdough, book, Playmobil toys
Just for Fun: summer movie program, movie date, carriage ride 

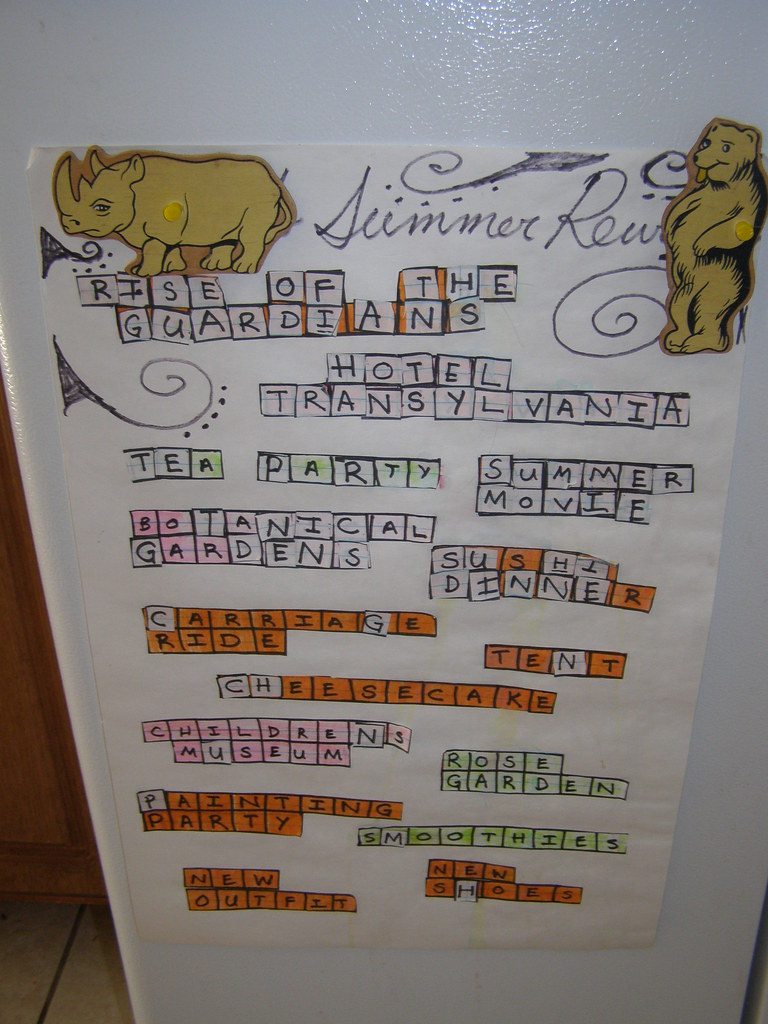
Wording is important here. The longer the name of the reward, the more effort it will take to earn. For example, if a trip to the zoo would be very cheap and easy for your family to accomplish, just spell out "zoo". If your zoo is expensive and/or difficult to get to, you might write "zoological park". I knew our oldest really wanted a couple of new movies, so I spelled out "Rise of the Guardians" and "Hotel Transylvania".

2. Make the rewards boxes.

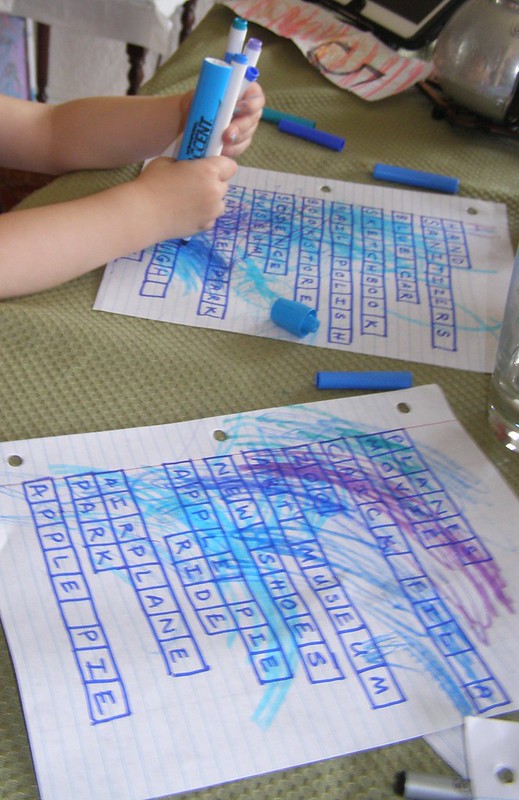
Now, to write the rewards for the charts. I just did mine freehand since this was an experiment to see if the girls would respond well to this type of reward system. On lined paper, I drew square boxes and wrote the name of the reward with capital letters, one per box. To make life easier on myself, I used a black permanent marker for all of one girl's letters and a blue permanent marker for the other one.

You'll need two identical sets of letters, one for the reward chart and one to draw out of a bag. I made a second set by laying a blank sheet of paper on top of the first, tracing the same boxes, and writing in the same rewards. 

For the rewards I would be pasting on the chart, I let the kids decorate their own. (The second set needs to be either left plain white or colored differently enough to distinguish when the reward has been earned). The three-year-old used three markers in each hand and scribbled all over the papers. The six-year-old meticulously colored each of her rewards with a different color. After they were finished, I cut out the rewards in blocks of words and pasted them to the large piece of paper. I had the girls organize their charts by priority. What they wanted to earn first went at the top of the chart. Then I added some decorative flourishes.

3. Make the letters to be earned. 

To make the letters to be earned, I cut apart the second (uncolored) set of letters. Each letter should occupy its own square. With luck, the squares will be the same size as the ones on the chart. Discard any blank boxes, such as those between letters.

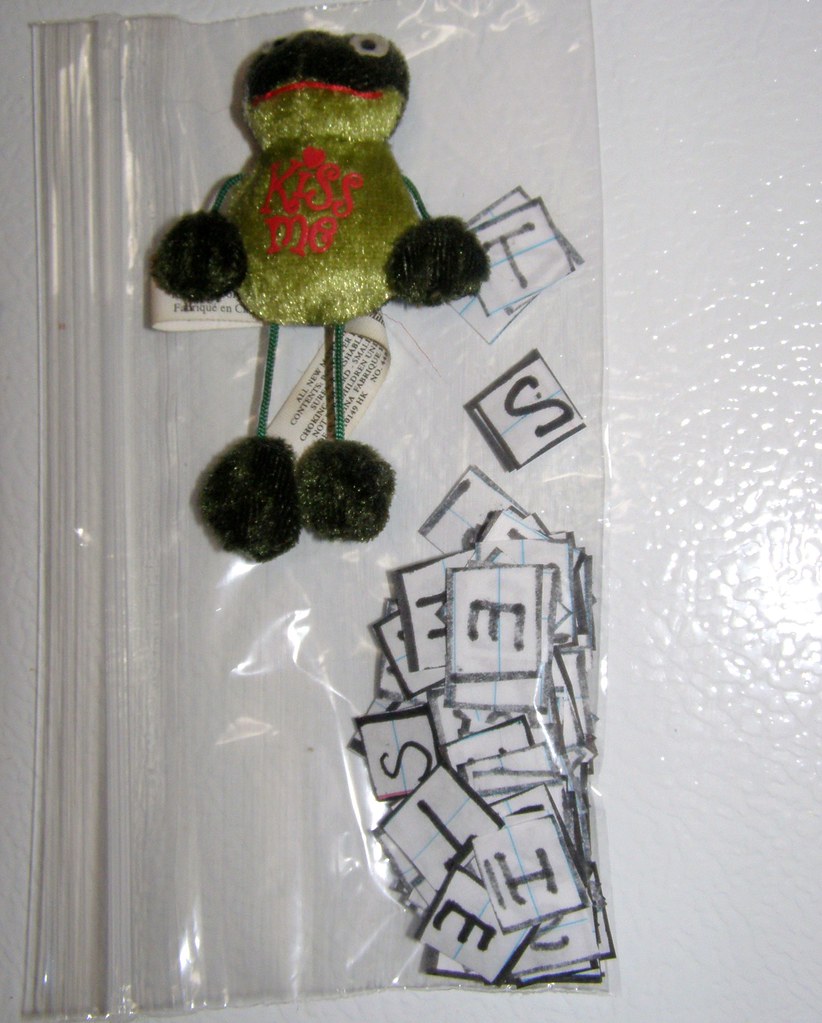
Note: this picture is of the six-year-old's letters, not the three-year-old's. They are written in black, not blue. It prevents any confusion if there happens to be a random letter on the floor.

4. As letters are earned, paste them on the chart. 

So let's say the three-year-old puts away her laundry. She gets to pull a letter from her baggie. Then she matches it up and glues it onto a matching letter on her chart. When she has earned all the letters in the word, she gets the reward. At first I thought this would only work with the six-year-old, but the three-year-old is surprising me with both her desire to earn letters and her ability to match the letters she earns with the words on the chart.

5. As rewards are redeemed, mark them off the chart. 

Our preferred method has been to write the date in large numbers and letters over the name of the reward (which I had not yet done at the time of the pictures on the left). That way, the kids see when they earned that reward and when I fulfilled my promise to give it to them. Although right now, the three-year-old has earned three rewards that I have not yet been able to do with her.

So there you have it. It's cheap and easy, but seems to be working well for us.


Wednesday, October 24, 2012

Tobacco Hornworms


Yep, you read that right. Tobacco Hornworms. This isn't a craft project per se, but a cool science experiment the Miniature Master Gardener (MMG) and I did just for fun (and counted as part of her homeschool science curriculum). It's a long story, so settle in with a cup of hot tea and enjoy!

The Mysterious Origin of our Tomato Plants

Let's go back to the very beginning. Two summers ago, we had the brilliant idea to start a compost bin. We set an old MDF dresser on its side (without the drawers) and chucked in all our compost ingredients. The bin went well until the MDF started to fall apart and we noticed mice were drawn to it. So we carefully moved the compost bin and contents to the opposite corner of the yard, away from the house. It remained there for a while, but we started seeing snake skins and bunny droppings around it. Finally, we gave up on the rotting dresser. However, my brilliant husband, an avid Pinterest user, has found several ideas and hopes to build me a new and improved compost bin sometime in the future.

The original site of the compost bin has yielded some very fun mystery plants. We had a cantaloupe vine grow out of there which yielded just one cantaloupe, but the best cantaloupe I've ever had. We had an avocado tree sprout, but the two-year-old pulled all the leaves off of it. We have a new tree that I think is a peach tree. And we had 4 tomato plants grow from there. Two we transplanted to our official "garden" area, and two we left growing in the five-foot-wide space between the fence and the house.

The Finding of the Caterpillars

The two tomato plants in the garden seemed to be doing much better than the ones we left by the house. Imagine my surprise when I found two of these big, intimidating caterpillars on the upper leaves!

We looked them up on the computer and found out many things. Most tomato farmers consider them pests and advise quickly dunking them into a cup full of soapy water (in case you have some or too many of these beauties you need to make disappear, that's what I recommend). Often these caterpillars play host to a parasitic wasp and some sites recommended keeping the caterpillars infected with the wasps alive long enough to allow the wasps to hatch and infect more. Other websites claimed to plant tomato plants in the hopes of attracting the hornworms.

From what I could tell, these are tobacco hornworms, which are very similar to tomato hornworms. Both feed on tomato and tobacco plants. The spike, while menacing, is a fake.

Caterpillar Adoption

Caterpillars in the Jar
So we rounded up the first two, plus a third one,  and put them in a large pickle jar. They need plenty of soil for burrowing, since these caterpillars make their cocoons underground. We also put in a sponge and lots of fresh green tomato stems and leaves. It was really neat to watch them munch away on the leaves. The girls were able to use magnifying glasses to see the caterpillars' eyes and mouth.

Big Fat Caterpillar
At first, they didn't seem to eat much. In just a few short days, they were eating a whole jar's worth of leaves within a few hours. I hoped my poor tomato plants would be able to keep up with them. The caterpillars grew fat, as large around as my thumb, and twice as long. I'm not exaggerating! Look them up for some pictures on how gigantic they get. The picture at right is not quite their full size.

Remnants of a Cocoon

Burrow

Then one by one, they lost  interest in the leaves and started doing "laps" on the dirt at the bottom of the jar. They slowly burrowed into the soil. One burrowed pretty close to the glass, so we could see when her cocoon formed. For a long time, nothing happened. I had to remove the remaining leaves because they started to rot. We set November 1st as their eviction day if nothing happened.

Sphinx Moths

(Or Hawk Moths) As I was passing by the jar a couple days ago, I noticed the surface of the dirt was not smooth like usual. There was something on it. I looked closer and found a large moth lying on its back with its legs in the air. We took the jar outside and gathered up some more foliage from the tomato plants (which were thriving again by this time). It was a little bit of a struggle for the moth to get on the plant, but once she did, she scurried quickly to a spot where she could hang. Her wings were shriveled, but a few hours later, she had long brown mottled wings that were straight.
"Liz" getting cozy on the leaves


Soon after, the second moth emerged. She moved up the leaves more quickly and got in to Liz's spot. There was some fluttering as the two moths sorted out who was going to hang where. That attracted the attention of my cat (since these moths are huge, look like bats, and are often confused for hummingbirds) and merited the jar being shut up in the bathroom for the night.

By the next morning, the third moth had emerged and the first two had straightened their wings. It was time to say goodbye.

 We planned some time at the end of our school day to walk to the wilderness area near our house and drop off the moths (same place we released a turtle that wandered into our yard). We picked the same spot as the turtle: just on the edge of the pond, under a tree. After a few solemn words, the gardener pulled the masking tape off the lid. Instead of a massive fluttering of wings, Liz flopped out onto the ground after getting her foot stuck in the tape and crawled really quickly toward me. I imagine she thought I was some sort of tree. We got a stick and convinced her to grab onto that while we moved her to the tree. As soon as we put her on the trunk, she crawled to the edge and clung to the side with her wings folded around her.


Notice the bright body spots.
Perfect Camoflauge

The second moth, "C" climbed onto her stick after we showed it to her. Mini Master Gardener (okay, I've got to come up with a better nickname for her), actually got to hold the stick. C pretty much stayed like the below picture once she got on the tree. 
 Since "E", the last moth, was snacking on a tomato flower and had the most fragile wings, we moved her and the foliage at the same time.

 Our caterpillars turned out to be really fun. Mini Master Gardener is already hoping for some new ones in the spring.

Shared on Friday's Nature Table at The Magic Onions: http://www.themagiconions.com/2012/11/fridays-nature-table-7.html