Showing posts with label Kids. Show all posts

Friday, June 28, 2013

Fairy Garden 2013

Fairy Garden 2013
Fairy Garden 2013
Some of you may remember our fairy garden from last year. If not, see our "Making Our Very Own Fairy Garden" Part 1 and Part 2 for setting up the barrel planter and our cute little mushrooms.

I'm not sure if our fairies migrated to the evergreen Holly bushes, left for warmer climates, or hibernated, but at the end of winter, our little garden looked like this:
Fairy Garden 2013
We knew we had our work cut out for us. 

1. Clear the Debris. 

We wanted a clean start for our garden. We carefully removed all the river rocks, washed them, and set them aside. We got rid of all the plant debris. The fence and ladder pieces we set aside to be repaired. 
Fairy Garden 2013

2. Repair.

Our fence and ladder pieces needed a lot of work, but nothing was a match for a new bottle of wood glue and a little patience. Sadly, the bench could not be saved. We're looking to buy another or perhaps might make one. 
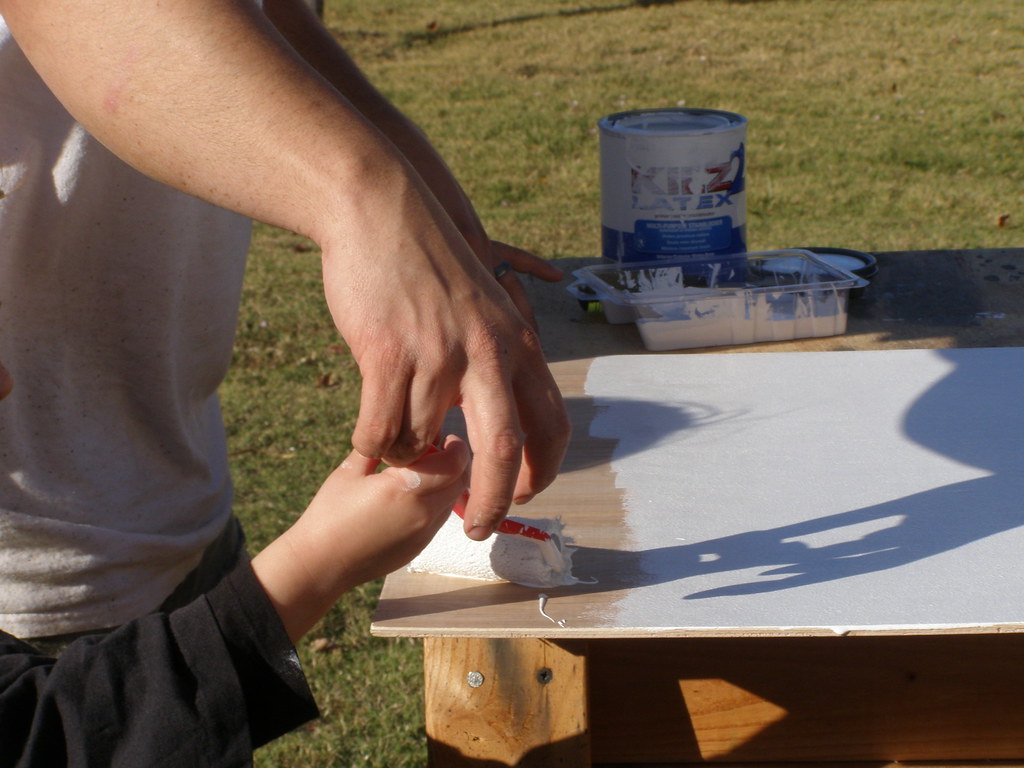
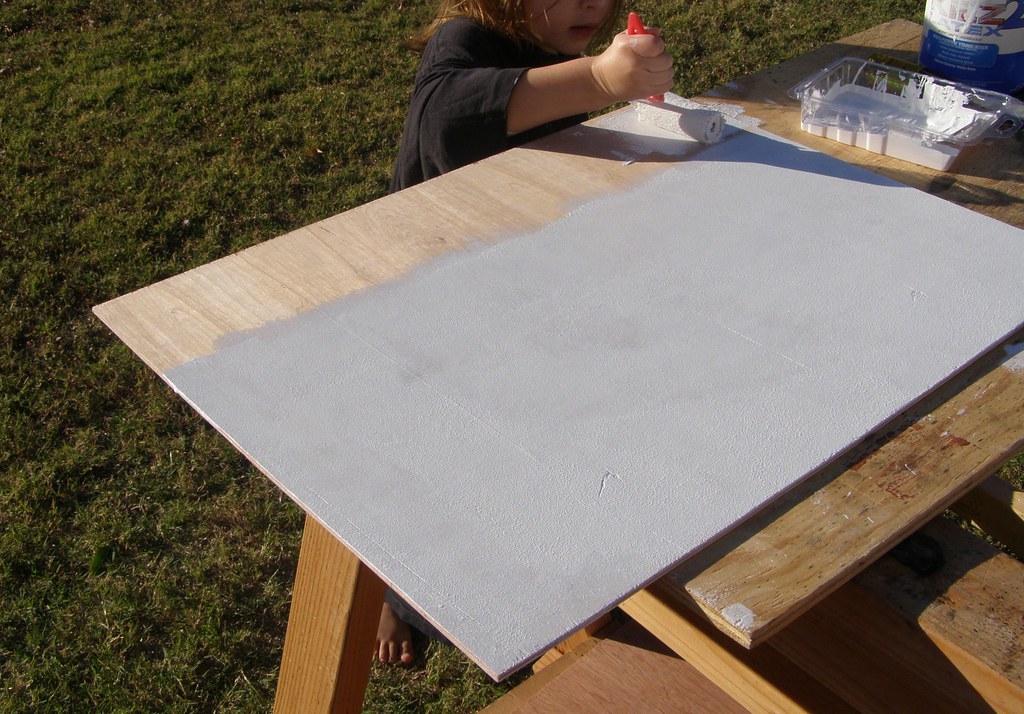
3. Build the House. 

This year we decided to build a house for our fairies to live in. My husband had built the front panel for a different project quite some time ago. I found some shelf scraps and built a little three-sided structure. 
 Fairy Garden 2013
We then attached the front using some leftover hardware. 
 Fairy Garden 2013Fairy Garden 2013
 Fairy Garden 2013
We cut down a scrap piece of moulding and added it above the front. 
 Fairy Garden 2013
Finally, we applied our shingles with wood glue. We used canvas stretchers that came with the canvases for my painting projects. 
Fairy Garden 2013

 Fairy Garden 2013

4. Shop! 

We love adding accessories to our garden. This year's purchases included a beautiful bridge from Petsmart, which is probably my favorite addition. It's made for an aquarium and has held up to the outdoor conditions pretty well. From the dollar store we bought a resin dog, artificial grass with butterflies, more river rocks, and a mirror to use as a reflecting pool. All of these were installed using river rocks as pathways and a riverbed leading to the reflecting pool.
Fairy Garden 2013Fairy Garden 2013

5. Plants.

Last year we didn't have much luck with the moss, so we decided to skip it. Instead we planted several flowers including violas, petunias, and lobelias. We bought a few extra plants, so we had two secondary containers other than the main fairy garden. 

 Fairy Garden 2013Fairy Garden 2013Fairy Garden 2013Fairy Garden 2013Fairy Garden 2013Fairy Garden 2013Fairy Garden 2013

Pretty simple this year. Other than the house, we didn't do much. After a few weeks, our garden looked even better. This year was a pretty rough tornado season. A couple of days, we weren't sure what we would find when we returned from taking shelter. On both days, the fairy garden (and our house) survived. The ladder blew off once, but other than that, everything was still in its proper place (despite trees and fences being blown down in our neighborhood). We are very blessed and thankful.

Fairy Garden 2013Fairy Garden 2013

Fairy Garden 2013

Fairy Garden 2013

Fairy Garden 2013

Fairy Garden 2013

Fairy Garden 2013

Fairy Garden 2013

Fairy Garden 2013

Fairy Garden 2013


This Fairy Garden has been entered into the 2013 Fairy Garden Contest on the Magic Onions. Check out all the fairy gardens here and maybe be inspired to make your own!

Thursday, June 20, 2013

Quick and Easy Rewards Chart

I am pleased to announce that I am done with school for the semester! Only two classes left until I finally get my degree.

That being said, I apologize for the lack of posts on here lately. After school wrapped up for the year, I went a little craft mad. I currently have eight new projects to share with you. It's just a matter of getting the posts typed up. Without further ado, here is one of them.

Making a Quick and Easy Rewards Chart

I found a really cute idea for rewards on Pinterest that was designed for a classroom.The basic premise was to have a reward for the class, which would be earned over time. The students would earn letters, which they could affix to the chart to spell out the name of their reward. Check out the original post on An Educator's Life here.

Okay, so I don't have a full class. I have one almost first-grader and a three-year-old, but I loved the idea. Not wanting to spend any money on a rewards chart that might not work, I got out the paper and markers to make a super cheap version.

Materials (per chart)

  • 1 12 x 18" sheet of paper
  • 4 sheets lined paper (or graph or copy)
  • 1 permanent marker
  • glue stick
  • colored markers

1. Brainstorm reward ideas. 

You'll need about 15-18 per chart. We came up with some pretty neat ideas.

Educational Outings: Science Museum, Art Museum, Children's Museum, Zoo,  Airplane Park, Nature Park, Botanical Gardens
Free But Fun: chair tent in the living room, playtime on the top bunk (which is still off-limits until the little one is a bit older), Rose Garden
Parties: tea party, painting party
Treats: favorite fast food, smoothie date, sushi dinner, apple pie, cheesecake
New Stuff: outfit, shoes, sketchbook, Matchbox Car, playdough, book, Playmobil toys
Just for Fun: summer movie program, movie date, carriage ride 

Wording is important here. The longer the name of the reward, the more effort it will take to earn. For example, if a trip to the zoo would be very cheap and easy for your family to accomplish, just spell out "zoo". If your zoo is expensive and/or difficult to get to, you might write "zoological park". I knew our oldest really wanted a couple of new movies, so I spelled out "Rise of the Guardians" and "Hotel Transylvania".

2. Make the rewards boxes.

Now, to write the rewards for the charts. I just did mine freehand since this was an experiment to see if the girls would respond well to this type of reward system. On lined paper, I drew square boxes and wrote the name of the reward with capital letters, one per box. To make life easier on myself, I used a black permanent marker for all of one girl's letters and a blue permanent marker for the other one.

You'll need two identical sets of letters, one for the reward chart and one to draw out of a bag. I made a second set by laying a blank sheet of paper on top of the first, tracing the same boxes, and writing in the same rewards. 

For the rewards I would be pasting on the chart, I let the kids decorate their own. (The second set needs to be either left plain white or colored differently enough to distinguish when the reward has been earned). The three-year-old used three markers in each hand and scribbled all over the papers. The six-year-old meticulously colored each of her rewards with a different color. After they were finished, I cut out the rewards in blocks of words and pasted them to the large piece of paper. I had the girls organize their charts by priority. What they wanted to earn first went at the top of the chart. Then I added some decorative flourishes.

3. Make the letters to be earned. 

To make the letters to be earned, I cut apart the second (uncolored) set of letters. Each letter should occupy its own square. With luck, the squares will be the same size as the ones on the chart. Discard any blank boxes, such as those between letters.

Note: this picture is of the six-year-old's letters, not the three-year-old's. They are written in black, not blue. It prevents any confusion if there happens to be a random letter on the floor.

4. As letters are earned, paste them on the chart. 

So let's say the three-year-old puts away her laundry. She gets to pull a letter from her baggie. Then she matches it up and glues it onto a matching letter on her chart. When she has earned all the letters in the word, she gets the reward. At first I thought this would only work with the six-year-old, but the three-year-old is surprising me with both her desire to earn letters and her ability to match the letters she earns with the words on the chart.

5. As rewards are redeemed, mark them off the chart. 

Our preferred method has been to write the date in large numbers and letters over the name of the reward (which I had not yet done at the time of the pictures on the left). That way, the kids see when they earned that reward and when I fulfilled my promise to give it to them. Although right now, the three-year-old has earned three rewards that I have not yet been able to do with her.

So there you have it. It's cheap and easy, but seems to be working well for us.


Thursday, February 7, 2013

Backyard Visitors

One of the nice things about living near the edge of a large city and homeschooling is that we can pause our day to observe a rabbit for about half an hour and count it as science. Check out some of the critters who have visited us recently:

We found this poor little guy stuck in the chalk box. He was quite happy to crawl out and onto our fingers.

And here's our bunny friend. The cat spotted him first, but we didn't let him outside. The bunny happily hopped around the backyard munching on various weeds for quite some time. The girls thought it was amazing and were excited that he let me take his picture.


Shared on Friday's Nature Table- The Magic Onions

Thursday, January 24, 2013

Canvas Painting Party

I'm sure all of you have seen those amazing birthday parties on Pinterest and other places where everything looks perfect. The favors are adorable, the cake looks professional, even the kids are photogenic. You know the ones. I'm sure, given the right budget, amount of time, and a professional team of house cleaners, I could throw one of those parties. Until that day arrives, I will continue to approach birthday parties with my same formula.

1. A theme, kinda keeps things together. This year was Cake and Canvas, a clever parody of the Coffee and Canvas classes I teach at our church.

2. Something homemade. This year, it was these cool canvases. For the younger daughter's birthday a couple years ago, I made owl treat bags out of fabric.

3. Save a year, splurge a year. The older daughter (I seriously need clever nicknames for these two kids) got to have a ceramics-painting party at a studio last year followed up by a tea party with the cups the girls painted. This year, an inexpensive home party.

4. Buy as little licensed merchandise as possible. For our Hello Kitty party, we bought Hello Kitty plates, cups, and a tablecloth. We made a Hello Kitty pinata. Everything else was purchased in coordinating colors.

5. Try to have something cool as a party favor. For this party, we bought plastic cups that look like crayons. We filled each cup with two paintbrushes and enough candy for the brushes to stand up. The kids got to use their new brushes to paint and took them (and their painting) home after. Did I get a picture? No, sorry.

6. I'm sure this won't count as any sort of tip, but if you have a friend who is an aspiring baker and offers you a cake instead of a gift, take her up on it! I am so blessed to have an amazing friend who bakes the girls' cakes for me. They always turn out so well. Again, no picture. But this year's cake was a palette with different colored icing globs of "paint" on it.


Prepping Paint Boards for a "Canvas" Party 

The irony of this "Cake and Canvas" party is that we didn't actually use canvas at all. The kids painted on thin plywood panels that we tacked to our fence. Here's what we did ( and by we, I mean my amazing man. I helped a little and took pictures). 

Here's What You'll Need:

  • 1- 4' x 8'  plywood underlay board, approx. 1/4" thick. I believe ours was around $10. 
  • Saw
  • Kilz 2 Latex primer
  • Paint Roller
  • Hammer
  • Nails

1. Cut the boards. 

Cutting the board in half lengthwise, then cutting the halves into 18" wide segments will yield 10 18" x 24" boards. Or, you can leave the last two segments longer and have 8 18" x 24" boards and 2 24" x 24" boards.

2. Sand and Primer the Boards. 

If you're feeling like an over-achiever, you can even use some wood putty to fill in any imperfections. Use a paint roller and apply 1-2 coats of latex primer. Even the birthday girl stepped in to help on this one.

Note: your boards may begin to warp. If so, after they are dry, stack them and place a weight on top to counteract the warp.


3. Tack the Boards to Your Fence. 

We used small nails, but you could use a staple gun (in theory, that is, haven't tried it).

P. S. This party was on a very warm day in November, in case you were wondering. I've got a few other posts from last year I'm still working on. 

4. Set up the Paint Refill/Handwashing Station. 

As they arrived, each kid was given two paintbrushes in his/her treat cup. We also provided palettes by cutting thumb holes in foam plates. (I had wanted to make berets, too, but ran out of time). Then we loaded up the palettes with 3-4 colors of tempera paint for each kid. We have a plastic picnic table that served well for our paint refill station. The hand-washing station consisted of a large plastic tub filled with warm soapy water. It came in handy since each child finished his/her painting at a different time. Those who were finished could wash their hands and go play. Here's the birthday girl herself playing in the bubbles. Look closely and you might be able to spot a couple of the party favors.


5. Enjoy Your Guests' Creativity. 

The kids had a blast decorating their paintings. We had a couple canvas left over, so my sister and I tried our hand at splatter painting. So fun. After the painting was finished, we went inside for cake, ice cream, and presents. By then, the paintings were pretty much dry. As the guests left, we pulled their art off the fence, removed any tacks, and sent it home.

But wait, you're not done yet! We discovered something pretty nifty about these little boards. See the above painting? While it might look like an abstract interpretation of earthworms and purple yarn, it's actually a prime example of the birthday girl playing with the paint rather than painting. Which was fine. She had fun, which was the goal, but she wasn't happy with her art. So, on to round 2, if you want. I'll demonstrate with mine.

6. Rinse/Scrub/Rinse for a Clean Canvas. 

Since we used non-toxic tempera paint, we were able to rinse it off outside. Then we took a scrub brush to get off most of the paint. Another rinse, and the globs of paint were gone. Yes, I did feel like a painting executioner. Some of the color remained, but it was much lighter than before.

Before

During
After   

7. And Paint Again! 

I'm sure you would be able to repeat the process a few times before the canvas was too stained to paint over. Even then, you could switch to acrylic for the last round and make the painting permanent.