Showing posts with label Toys. Show all posts

Saturday, June 30, 2012

Braided Rag Rug Basics- and Rapunzel Hair!

Rope Made from Rags
After every project, I meticulously fold and put away the leftover fabric. The scraps that are simply too small for anything else get tossed in a box. The leftover sleeves and seams from the T-shirt duvet cover that I've been working on (and I promise I will finish eventually) go in the box as well. Sometimes, this box gets overly full. On those days, I drag it out and start cutting whatever is in there down to strips that are about an inch wide, braid them, and make ropes. I used to either knot or sew them, but I saw a clever method on Moda Bake Shop that I've tried out and really like.

The Rag Box


1. Starting out. 

Knot the Ends
To start, you'll need a whole mess of fabric, cut down to similar size strips. Moda uses a really pretty print in contrast with white fabric, but since we're doing this to use up scraps, be kind to the environment, and stick to a more rustic look, we'll be sticking with whatever comes out of the box (yes, that is an old bathing suit!). Some fabric may rip neatly, which will save cutting time. Also keep in mind the thickness of your fabric. If you have a thick upholstery fabric, sometimes as little as 1/2" is plenty, but if you have something extremely thin like tulle, 4" wide strips are necessary. Just play with it and you'll get a feel for what you like. I personally like the different textures, shapes, and sizes. It makes each piece unique. Moda recommends sewing the ends, I'm lazy and knot mine.

If you have fabrics that are not colorfast, you might consider prewashing them on a gentle cycle and air or line drying them before cutting into strips.

2. Braid. 

If you are unfamiliar with braiding, check out the diagram on this website for more information. It often helps to have something anchoring the other end of the braid, whether you use a safety pin and pin it to a couch, your jeans, or a rug, have a patient friend hold it, or hold the braid underneath your foot. Start braiding away and stop when you're within a couple inches of the end of your shortest strip. If you are making a rag rug, you will want the braid to be loose. If you are making Rapunzel hair or a rope, you can braid tightly.

If you need to take a break from braiding, a safety pin will hold the braids in place. Or you can use a bobby pin while adding more, which is faster to move and remove. 


3. Add More Strips as Needed. 

This clever trick (from Moda) saved me so much time! When you get to the end of your strip, lay another strip over the end, overlapping by about 1 1/2 inches. 


Overlap the Ends

Fold both of them over and cut a small slit through both.


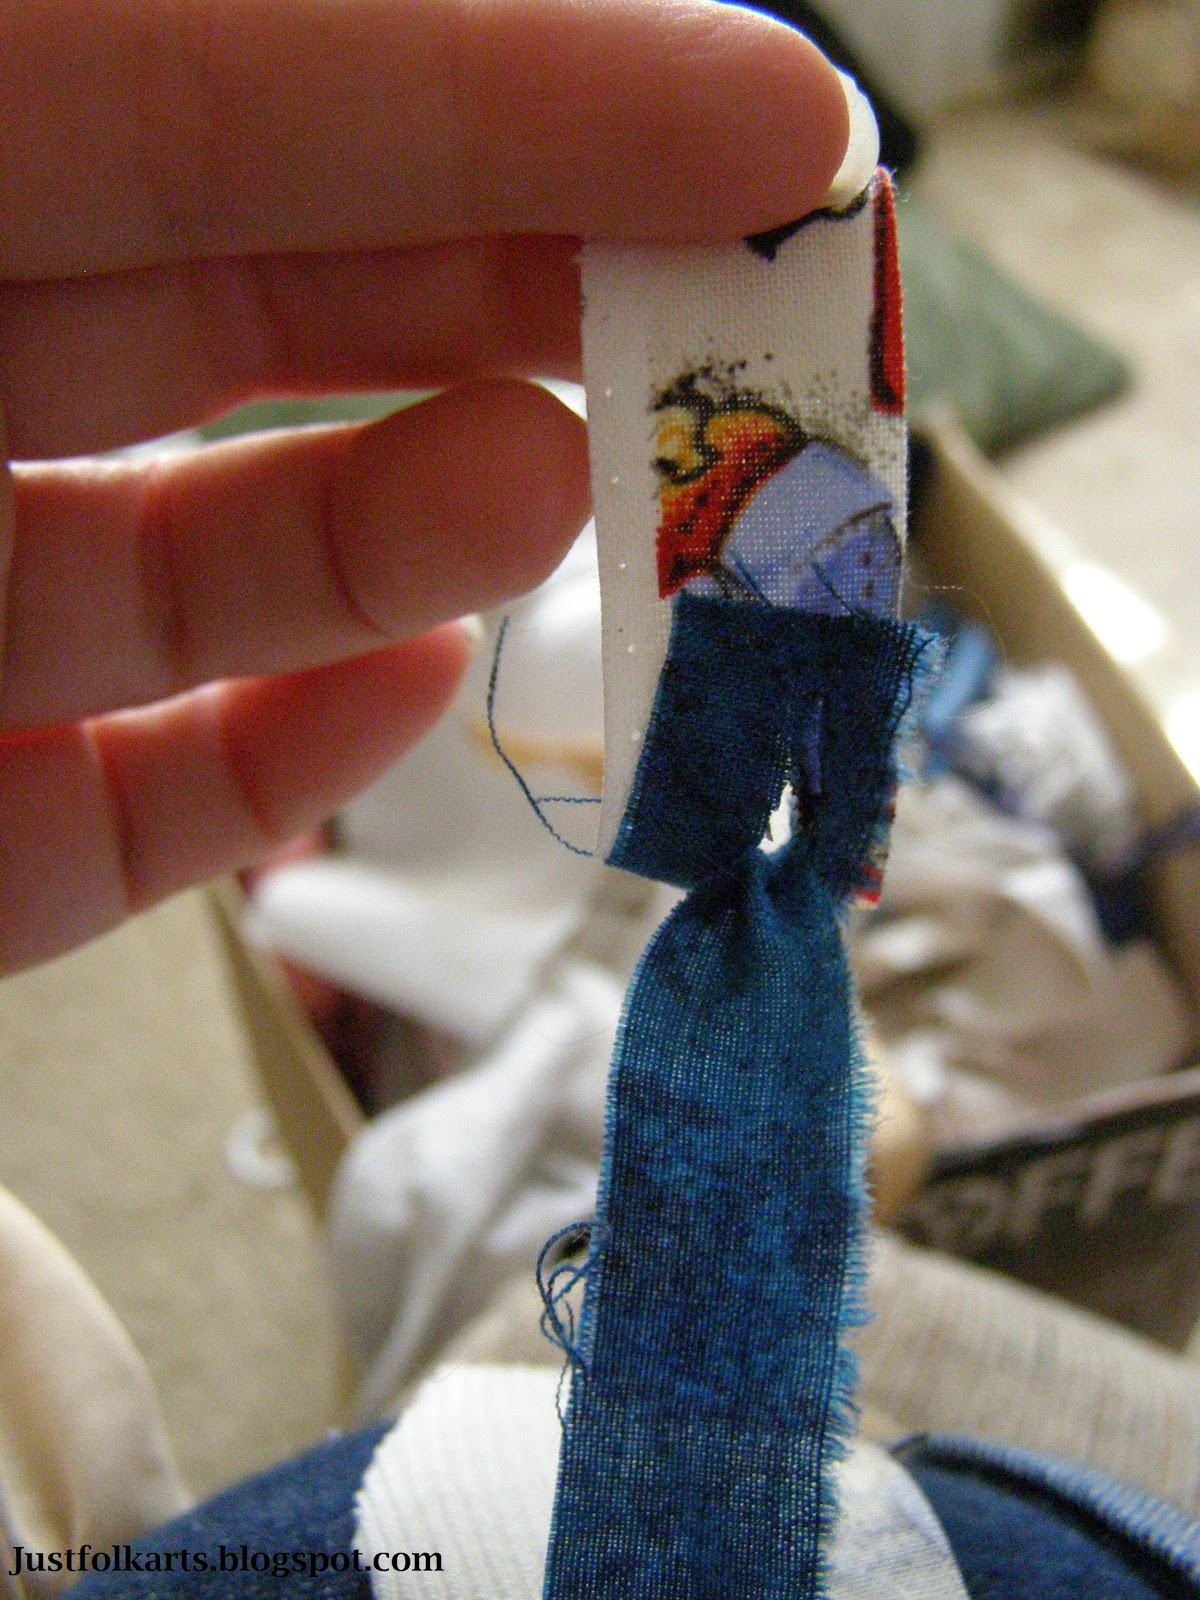
Take the end of your new strip, fold it under, and pull it up through the slit you've just made.


Pull tight.


Et Voila! Keep braiding like normal.


Here it is again with some different fabric:

Overlap the strips.
Fold them together.
Cut a small slit through both layers of fabric.
Unfold.
Pull the end of the new strip up through the slit.
Keep pulling gently.
When I'm adding new strips on, I like to pick three at a time. I add the longest new strip to the shortest old strip, the middle length new to the middle length old and the shortest new strip to the longest old strip. It helps to keep the braid fairly even.

As I started cutting more strips, I pre-cut the slits in each as well. I'm not sure which way is faster, but it was nice not having to reach for the scissors every few moments.

4. Keep adding until the desired length is reached. 

When the rope is as long as you need/want it, you can sew the ends or knot them. If you are working on something like a rag rug, I recommend just using a safety pin to hold the ends in place in case you wish to add more. I thought I had enough rope made for a rag rug I made for my sister, but I had nowhere near enough and had to add more on.

My two girls love to play like the fabric ropes are Rapunzel hair, hence the name. Really the only thing it has in common with Rapunzel's hair is the length and the braiding, but that doesn't stop their imaginations. I suppose if you used fabric in a hair-like color, it would look more like hair. Still, they love their ropes.


Tuesday, June 12, 2012

Making Our Very Own Fairy Garden Part 2


In my last entry, I discussed how we made our fairy garden. Since then I have been informed that it is a "Princess Garden", not a Fairy Garden. My apologies to our Miniature Master Gardener.

Our Princess Garden was almost complete at the end of the last entry, but we brought in the big guns (my husband) to make some neat wood projects that make the garden even more amazing. He made wooden mushrooms, fence panels, and a ladder for the princesses to get up to their garden.


Mushrooms

Taking inspiration from The Magic Onions, we decided to add mushrooms to our garden.


Here's what you'll need:

  • Sphere halves (sold at a craft store, 6 per pack)
  • 1/2" Diameter dowel rod
  • Nails
  • Patio paint- red & white

1. Drill holes in tops. 

To make his life easier, my husband drilled a hole through the center of each sphere half, slightly smaller than the nails he used.

2. Cut dowel rod.

He marked 6 2" long sections on the dowel rod and cut using a saw. The remaining piece of the dowel rod was saved for the top of the ladder.

3. Paint tops.

Our Miniature Master Gardener did this step. She painted the tops red. After they were dry, she added white dots.

4. Nail tops onto the stems. 

And you're done! Amazing little decorations for the amount of effort. They are probably the two-year-old's favorite thing about the Princess Garden as she is constantly rearranging them.


Fence Panels

For each panel, you will need:

  • 7 popsicle sticks
  • wood glue (preferably outdoor safe)

1. Cut the popsicle sticks in half. 

Cut 3 of the popsicle sticks in half. Set 1 half aside for another panel (or something else).

2. Lay out the pieces. 

Arrange 5 stick halves parallel to each other, about 1/4" apart. Place one of the whole sticks on either side, parallel to the others with the tops (round edges) flush.

3. Glue.

Run a line of glue along the remaining sticks. Place them glue side down onto the other sticks, so that one stick runs 1/2" below all 7 tops and the other stick runs across the bottoms of the half sticks and the middle of the whole sticks. See the picture if I've completely confused you.

Mushroom, Ladder, and Fence

Ladder

Our princesses were using the vine to climb up to their garden, but they decided the vine was starting to look a little worn and they needed a ladder instead.

Materials:

  • 16 Popsicle sticks
  • 1/2" diameter dowel rod
  • Safety wire
  • Wood glue

 1. Cut the sticks.

Using a saw, cut 8 of the popsicle sticks in half. Cut the dowel rod into 2 sections approximately 4-6 inches long.

2.  Assemble the panels. 

Arrange 4 of the half sticks parallel to each. Glue a whole stick across the tops of the half sticks. Glue a second whole stick across the bottoms, parallel to the first. Drill a small hole (large enough for the safety wire) in each end of each whole stick.

3. Wire it together.

Lay out the panels end to end. Using safety wire, connect the adjoining holes. Be sure to twist them together tightly and tuck all sharp ends under. At the top of the ladder, use safety wire to attach the dowel rod pieces. Stick the dowel rods into the soil.


And we're done!

Well, we're done for now. Our Master Gardener has mentioned painting the fence and some other projects. I'll be sure to keep you posted if we add anything. For now, they are enjoying the garden. Here are some pictures of the completed project.

Rearranging the Mushrooms


In the Garden

Of course, I had to take a ton of closeups. What photographer could resist such a charming and sweet space! I hope you are inspired to make your own Fairy Princess Garden. Thanks for reading about ours, we have enjoyed making it and playing with it.


Update: The Moss Rose is starting to bloom in the perfect shade of pink!


Sunday, June 10, 2012

Making Our Very Own Fairy Garden Part 1

Poking around on the internet one day (which I spend far too much time doing), I stumbled on "The Magic Onions" Blog and instructions on how to make a fairy garden. My little one and I loved the idea and started making plans to make one.

But that was last summer and a lot of plans I had for last summer fell through. We picked up a large planter with purple glaze on clearance, put it in the garage, and left it alone.

When we got back from our vacation this year, we decided to work on the fairy garden idea again. Here's what we did.

Assembling the Planter

For this part, you'll need:

  • 1/2 aged barrel (sold at most hardware stores)
  • 3-4 wood scraps of similar thickness
  • gravel
  • sand
  • potting soil
Fairy Garden Plan

1. Make a plan. 

First we did some research and looked up the great ideas on The Magic Onions Fairy Gardens. Then I interviewed our own little gardener (who is 5 1/2) about what she thought a fairy garden would need. Here's our plan, written out in step form. I apologize for the quality of the copy, it's been used already and has gotten water on it.

2. Place blocks under the planter.

The blocks will help with drainage and hopefully prevent some rust damage to the porch and planter.
The Half Empty Barrel

Notes on Working with a Whiskey Barrel: Some of the reviews I read said that people were having problems with the slats coming out on these. Some of the slats can be removed easily, but the clerk assured me they wouldn't budge once I had the soil in place. As you are filling your barrel, keep in mind the position of the bands. They may need to be adjusted as you go.


3. Fill 1/3 with gravel. 

When we moved in to our house, the front yard had been "landscaped" by putting in a few shrubs and dumping gravel in between them. One of my first orders of business was to pull out the gravel and replace it with mulch and weed paper. So we have quite the pile of dirty gravel in our backyard, just waiting for the right project. I thought this was it. So we painstakingly washed the gravel and picked out a few favorites. It was hot and dirty work and just when I thought I was making progress, it was time to go in and make some dinner. It would have taken at least 3 full afternoons to wash the gravel. Or I could have made a more efficient gravel cleaning system, but for the amount of gravel we needed, it was much cheaper and easier to pick up a couple bags at the store.


4. Fill 1/3 with sand. 

 We had some sand left over from my sister's wedding (from weighing down the arch). We used 1 1/2 bags of it for this project.


5. Fill 1/3 with potting soil. 

 Fill the barrel to within an inch of the top. (I had some help on this step, as you can see). Now it's all ready for planting!


Painting

We picked up a gazebo and miniature wheelbarrow from the craft store to put in our garden. A few coats of patio paint later, they turned into gorgeous decorations for our garden.


Planting

We used the following plants in our garden:

  • 6 Vinca flowers
  • 1 Vinca vine
  • 1 Dwarf Spruce
  • 1 Moss Rose
  • 1 Rubra Pussytoes (Ground Cover)
There is a rosemary plant in this picture, but we didn't put it in this garden.The dwarf spruce isn't pictured.

1. Lay out your garden arrangement (with the gazebo in place).

2. Plant the miniature tree.

3. Plant the flowers and other plants.

I had  lots of help for this step. The girls loved digging in the dirt and putting the flowers in place.


Decorating

Fairy Gardens are only limited by your own imagination, so feel free to go wild with the decorations! For ours, we used the following:

  • Gazebo
  • Wheelbarrow
  • Glass Votive Holder (for our tub)
  • Miniature Garden Tools- Watering Can, Shears, Trowel
  • Tiny Bucket
  • Flat Stones
  • Pretty Stones

 We tried to keep everything on the same scale as our Playmobil figures. We also added a few other things, but I'll discuss making them in my next post.

1. Lay a river bed. 

We made a hollow in the dirt on one side of the planter. Using the prettiest rocks from our gravel collection,we lined the hollow and pressed them into place.


2. Add a patio/path.

We patted down an area to make a fairly level "flagstone patio" to place our bench on. We then placed more stones to make a path leading to where our ladder would eventually go.

3. Add moss. 

The blog we used for inspiration recommended that we buy a flat of moss, but I scoured 3 different stores and could not find any. Luckily when my husband mowed after our vacation, I found we had our own patch of moss growing beside the house! We dug it up and added it wherever we didn't want any soil exposed. 

Playing

We did a few more projects which I will cover in a separate post. In the mean time, check out some pictures of how the garden looked at the end of this day.