

But that was last summer and a lot of plans I had for last summer fell through. We picked up a large planter with purple glaze on clearance, put it in the garage, and left it alone.
When we got back from our vacation this year, we decided to work on the fairy garden idea again. Here's what we did.
Assembling the Planter
For this part, you'll need:
- 1/2 aged barrel (sold at most hardware stores)
- 3-4 wood scraps of similar thickness
- gravel
- sand
- potting soil
 |
| Fairy Garden Plan |
1. Make a plan.
First we did some research and looked up the great ideas on The Magic Onions Fairy Gardens. Then I interviewed our own little gardener (who is 5 1/2) about what she thought a fairy garden would need. Here's our plan, written out in step form. I apologize for the quality of the copy, it's been used already and has gotten water on it.2. Place blocks under the planter.
The blocks will help with drainage and hopefully prevent some rust damage to the porch and planter.| The Half Empty Barrel |
Notes on Working with a Whiskey Barrel: Some of the reviews I read said that people were having problems with the slats coming out on these. Some of the slats can be removed easily, but the clerk assured me they wouldn't budge once I had the soil in place. As you are filling your barrel, keep in mind the position of the bands. They may need to be adjusted as you go.
 3. Fill 1/3 with gravel.

 When we moved in to our house, the front yard had been "landscaped" by putting in a few shrubs and dumping gravel in between them. One of my first orders of business was to pull out the gravel and replace it with mulch and weed paper. So we have quite the pile of dirty gravel in our backyard, just waiting for the right project. I thought this was it. So we painstakingly washed the gravel and picked out a few favorites. It was hot and dirty work and just when I thought I was making progress, it was time to go in and make some dinner. It would have taken at least 3 full afternoons to wash the gravel. Or I could have made a more efficient gravel cleaning system, but for the amount of gravel we needed, it was much cheaper and easier to pick up a couple bags at the store.
 4. Fill 1/3 with sand.
We had some sand left over from my sister's wedding (from weighing down the arch). We used 1 1/2 bags of it for this project.
 5. Fill 1/3 with potting soil.
Fill the barrel to within an inch of the top. (I had some help on this step, as you can see). Now it's all ready for planting!
Painting
We picked up a gazebo and miniature wheelbarrow from the craft store to put in our garden. A few coats of patio paint later, they turned into gorgeous decorations for our garden.


Planting

We used the following plants in our garden:
- 6 Vinca flowers
- 1 Vinca vine
- 1 Dwarf Spruce
- 1 Moss Rose
- 1 Rubra Pussytoes (Ground Cover)
1. Lay out your garden arrangement (with the gazebo in place).
2. Plant the miniature tree.
3. Plant the flowers and other plants.
I had lots of help for this step. The girls loved digging in the dirt and putting the flowers in place.


Decorating
Fairy Gardens are only limited by your own imagination, so feel free to go wild with the decorations! For ours, we used the following:- Gazebo
- Wheelbarrow
- Glass Votive Holder (for our tub)
- Miniature Garden Tools- Watering Can, Shears, Trowel
- Tiny Bucket
- Flat Stones
- Pretty Stones
We tried to keep everything on the same scale as our Playmobil figures. We also added a few other things, but I'll discuss making them in my next post.
1. Lay a river bed.
We made a hollow in the dirt on one side of the planter. Using the prettiest rocks from our gravel collection,we lined the hollow and pressed them into place.

2. Add a patio/path.
We patted down an area to make a fairly level "flagstone patio" to place our bench on. We then placed more stones to make a path leading to where our ladder would eventually go.3. Add moss.
The blog we used for inspiration recommended that we buy a flat of moss, but I scoured 3 different stores and could not find any. Luckily when my husband mowed after our vacation, I found we had our own patch of moss growing beside the house! We dug it up and added it wherever we didn't want any soil exposed.Playing
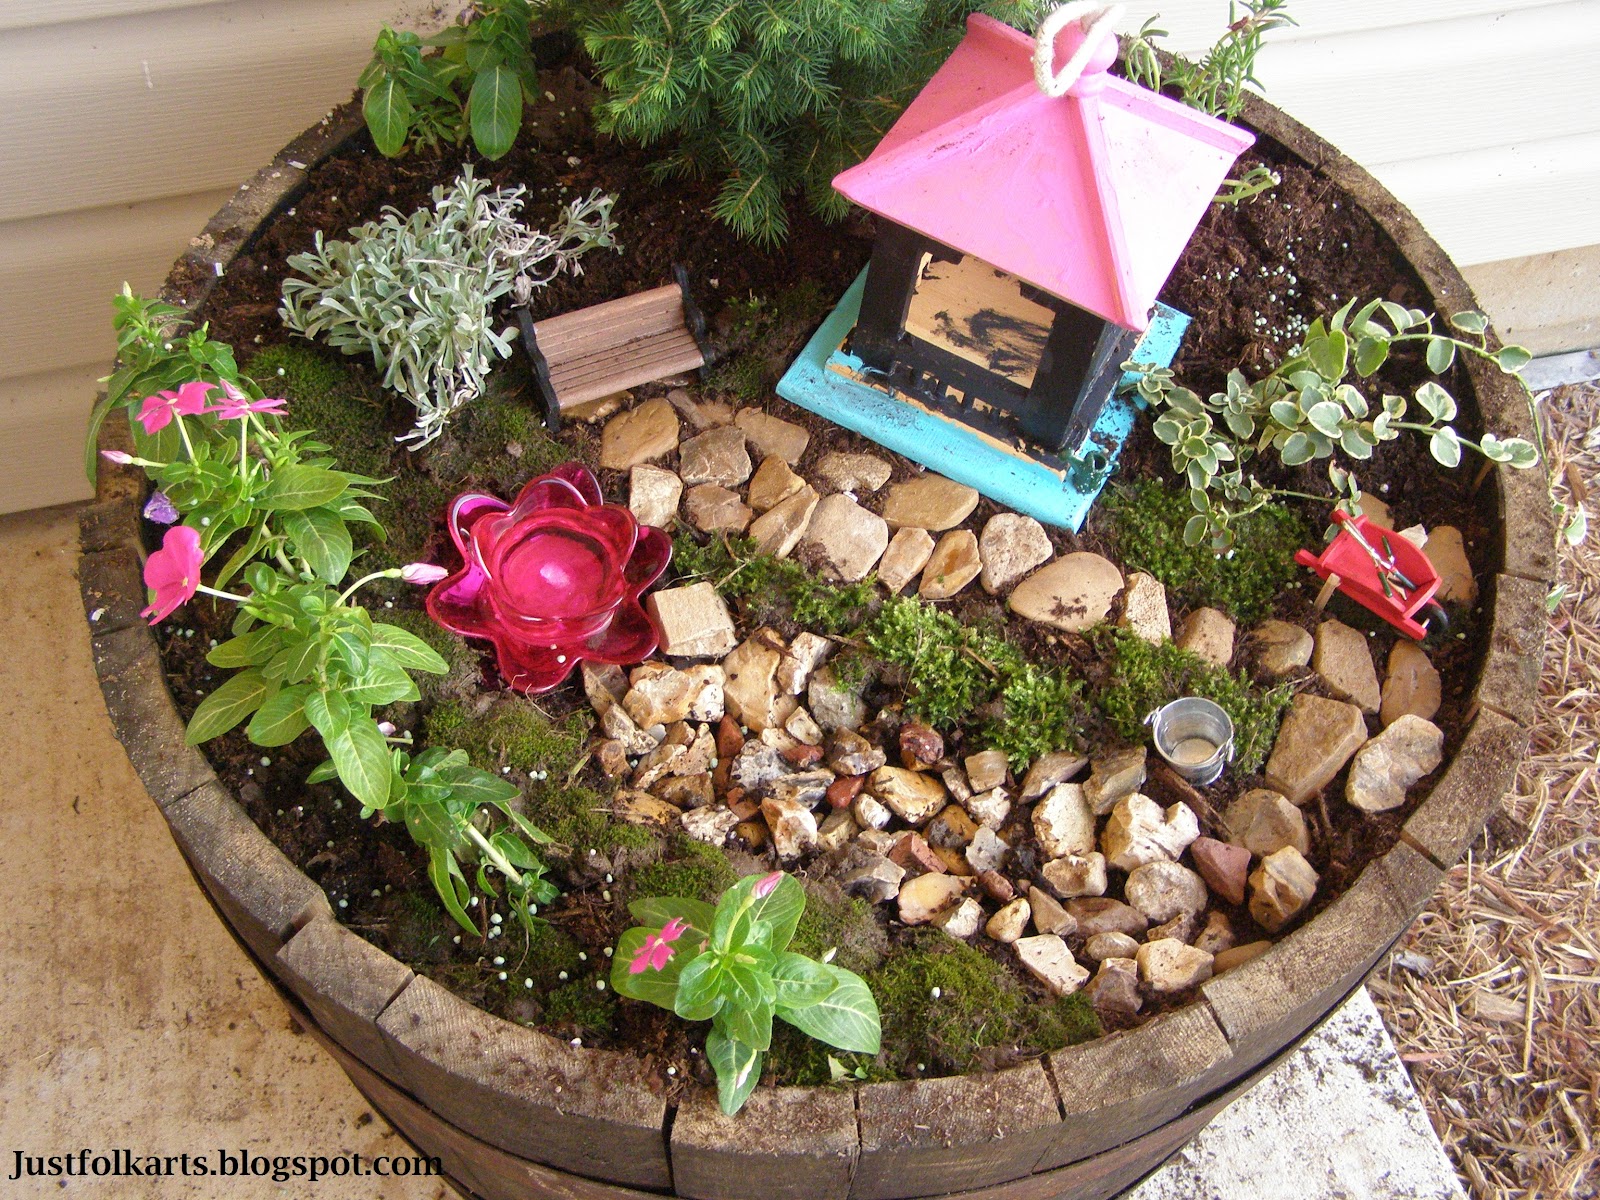
We did a few more projects which I will cover in a separate post. In the mean time, check out some pictures of how the garden looked at the end of this day.
Using a whiskey barrel is a very nice idea!
ReplyDeleteI will first drink it and afterwards build a fairy garden :P