Sunday, April 29, 2012

Angry Birds King Pig Pinata

Whoops! In my last post, I believe I said my next project was a duvet cover. Well, I haven't worked any more on the duvet cover and I had already planned to make this pinata for my daughter's 2nd birthday. My oldest (now 5) was a talker, but her sister is not. She nods, points, signs, etc, but not a lot of words. As far as I know, she doesn't have a favorite TV show or character, but she LOVES Angry Birds (and Cars 2, but sister's 2nd birthday was Cars-themed and the baby seems to like Angry Birds more). She plays them on the iPad, she plays them on the phone, she gets really excited when she sees them in the stores, and she even climbs all over me to point to any that show up on my computer screen.

We had our theme! Angry Birds! I started doing some research to see what Angry Birds party supplies were available. I suppose for party supplies, the prices weren't too bad. We didn't need a lot, since we deliberately kept the guest list very small (we rented an inflatable slide and a bouncy castle and didn't want her to have to compete with a ton of other kids for a turn). When you're used to paying $1 for 8 plates at the dollar store, the thought of paying $4 for 8 plates + shipping is a little much. And she's 2, she won't care about the plates. The 5-year-old might, but not the little one.

Here's the other problem with buying premade party supplies: the pinatas are usually pretty awful. They are made of cardboard with a cheap tissue paper exterior. Okay, maybe they're cheap and cheerful (as one of my favorite shows often says). No, on average they range from $20-$70. Pretty pricey, considering the materials cost less than $5 and it doesn't take a lot of skill to make them. Without further ado, here is my take on the Angry Birds King Pig Pinata.

Angry Birds King Pig Pinata

Our Pinata Ingredients

1. Gather your supplies. 

To make a regular pig pinata you will need: 

  • Newspaper, torn into 1" wide strips
  • White paper- I recycled some packing paper, but copy paper will work as well. 
  • Green tissue paper- 2-3 sheets
  • White Glue or Craft Glue (I used Allene's Tacky Glue).*
  • A Balloon, inflated with regular air and tied- round would be best, but we used an egg-shaped one. 
  • 1 8.5 x 11" sheet card stock
*Alternatively, you can make a very inexpensive glue from flour and water, but if you don't blend it just right, it will leave floury clumps on your finished product. Also, it tends to dry off-white to yellow.

To make a king pig, you'll need the above,  plus:

  • Aluminum foil
  • 1 8.5 x 11" sheet card stock
  • 4 plastic gems, approximately 1/2-1" in diameter. We recycled some that used to be in a stepping stone. 
  • Tape

To make a structure for the pig to sit on, you'll need:

  • Cardboard boxes of various sizes
  • Contact paper that looks like marble
  • Craft paper or paper grocery bags
  • Packing Tape
  • Brown marker
Glue Mixture

 2. Mix your glue. 

Mix equal parts glue and water in a large bowl. If the glue is a very good quality and/or very thick, increase the amount of water. I used about 1/2 cup glue and 3/4 cup water. The mixture should look and feel like whole milk.

 3. Apply the newspaper layer. 

Newspaper Strips in the Glue Bowl
This pinata will have 3 layers: newspaper, white paper, and tissue paper. The newspaper layer gives it structure. Put a handful of newspaper strips into your glue mixture. Don't put too many in at once or they will get too soggy and rip when you try to use them.The strips should be wet, but not saturated.


Pull one strip at a time from the bowl. Gently slide the strip between your index and middle fingers to get rid of the excess glue. Some of your strips will probably rip in this process, and that's okay.

(As a side note, I'm pretty proud of my 5-year-old who took the picture to the right and a lot of my other pictures on this post. No, I don't have a rash, that's a fading henna tattoo. )

Lay the strip of newspaper on the the balloon and smooth it down. I chose to do the first layer longitudinally. Keep applying strips, overlapping by a little bit each time. Patch any bare spots where you can still see the balloon with small or torn pieces. Also, using a second bowl to hold the balloon will help.


When that end of the balloon is fully covered, flip the balloon over and do the other side.


Laying down the first strips

First side nearly covered


First half finished

Starting second half

Putting on the final pieces


4. Apply white paper layer.


Starting the white paper layer
 Next add a layer of white paper using the same process as the newspaper layer. The packing paper I used did not tear as easily as the newspaper, so the strips were wider and more uneven. They also absorbed more of the glue mix and tore more easily when wet. Lay the white strips latitudinally over the newspaper strips.
Almost done!


5. Apply the tissue paper layer.

The tissue paper is the most fragile layer of the three. Since the white paper was pretty wet from the glue mixture, I pressed the tissue paper directly on top of it without soaking it in the glue first. Smooth any dry spots or places where the tissue paper is sticking up by spreading a little glue mixture over the spot with your fingers.


6. Make the crown. 

If you aren't doing a king pig, skip on down to step 7.

Fold your piece of card stock in half (short way), then in half again, parallel to your first fold.


Using the folds as a guide, mark and cut a zigzag line. This will give you 2 crowns to choose from. We went with the taller one. 

Tear a piece of aluminum foil just a little bit longer than the crown. Place the foil shiny side down on a table. Place the crown on the foil with the top of the points about 1/4" below the edge of the foil. Fold the excess foil up over the body of the crown, making sure the bottom of the crown is in the fold line. 

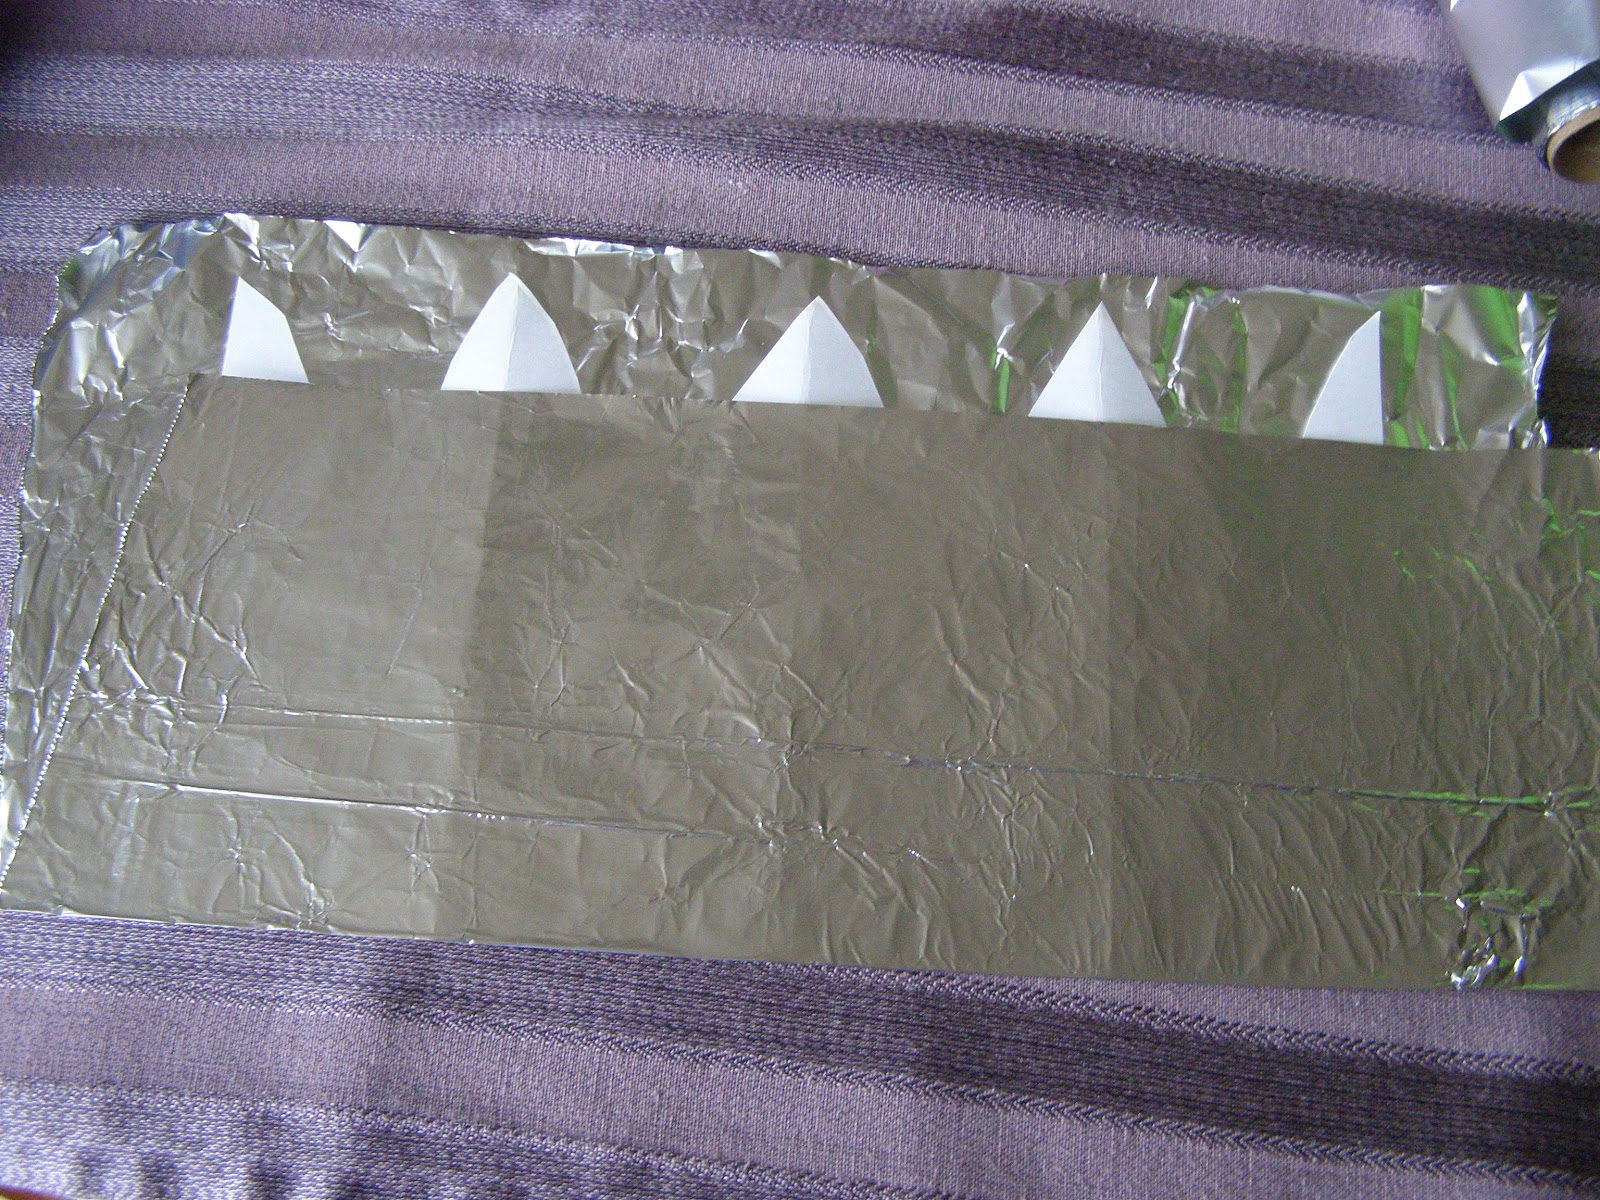
Cut a line from halfway between each two points of the crown to the lowest points in the "valleys" between.

Fold the cut pieces toward the crown points. 

Cut off the excess and hold in place with clear tape. 

Fold over the outside edges and hold in place with tape as well. 

I had decided to make my life easy and just use a silver crown. But my aforementioned 5-year-old insisted we needed a gold crown and offered to do it herself. Here she is performing alchemy with a yellow sharpie. 

Tape the two half-points together to make the crown. Using super glue, glue the gems in place. A word of warning- the super glue on ours reacted with the sharpie and turned bright red. One of our gems was a very pale blue and looked red on the finished product.

7. Dry the pinata. 

Allow the pinata to dry until the outer shell is stiff, at least overnight. Depending on how many layers you've put on it and/or the amount of glue you've used, it may take longer.

8. Fill it! 

Once the pinata is fully dry, mark a 2" square on the top of the "head." Using a sharp knife, cut 3 sides of the square. The balloon inside will pop with the first cut. Pull it out and discard (I had to borrow my daughter for this step). Make sure the inside of the pinata is dry before filling. Fill with your desired items. We used fruit snacks, soft pool balls, and lollipops. Since most of the guests were under 2, we shied away from an all-candy pinata. You could also use pencils, small bottles of bubbles, etc.
Our pinata filling materials


Once the pinata is filled, seal the hole with tape. If you are not adding a crown, you will need to cover the area with another layer of tissue paper. We covered it up by putting the crown on top with masking tape. 
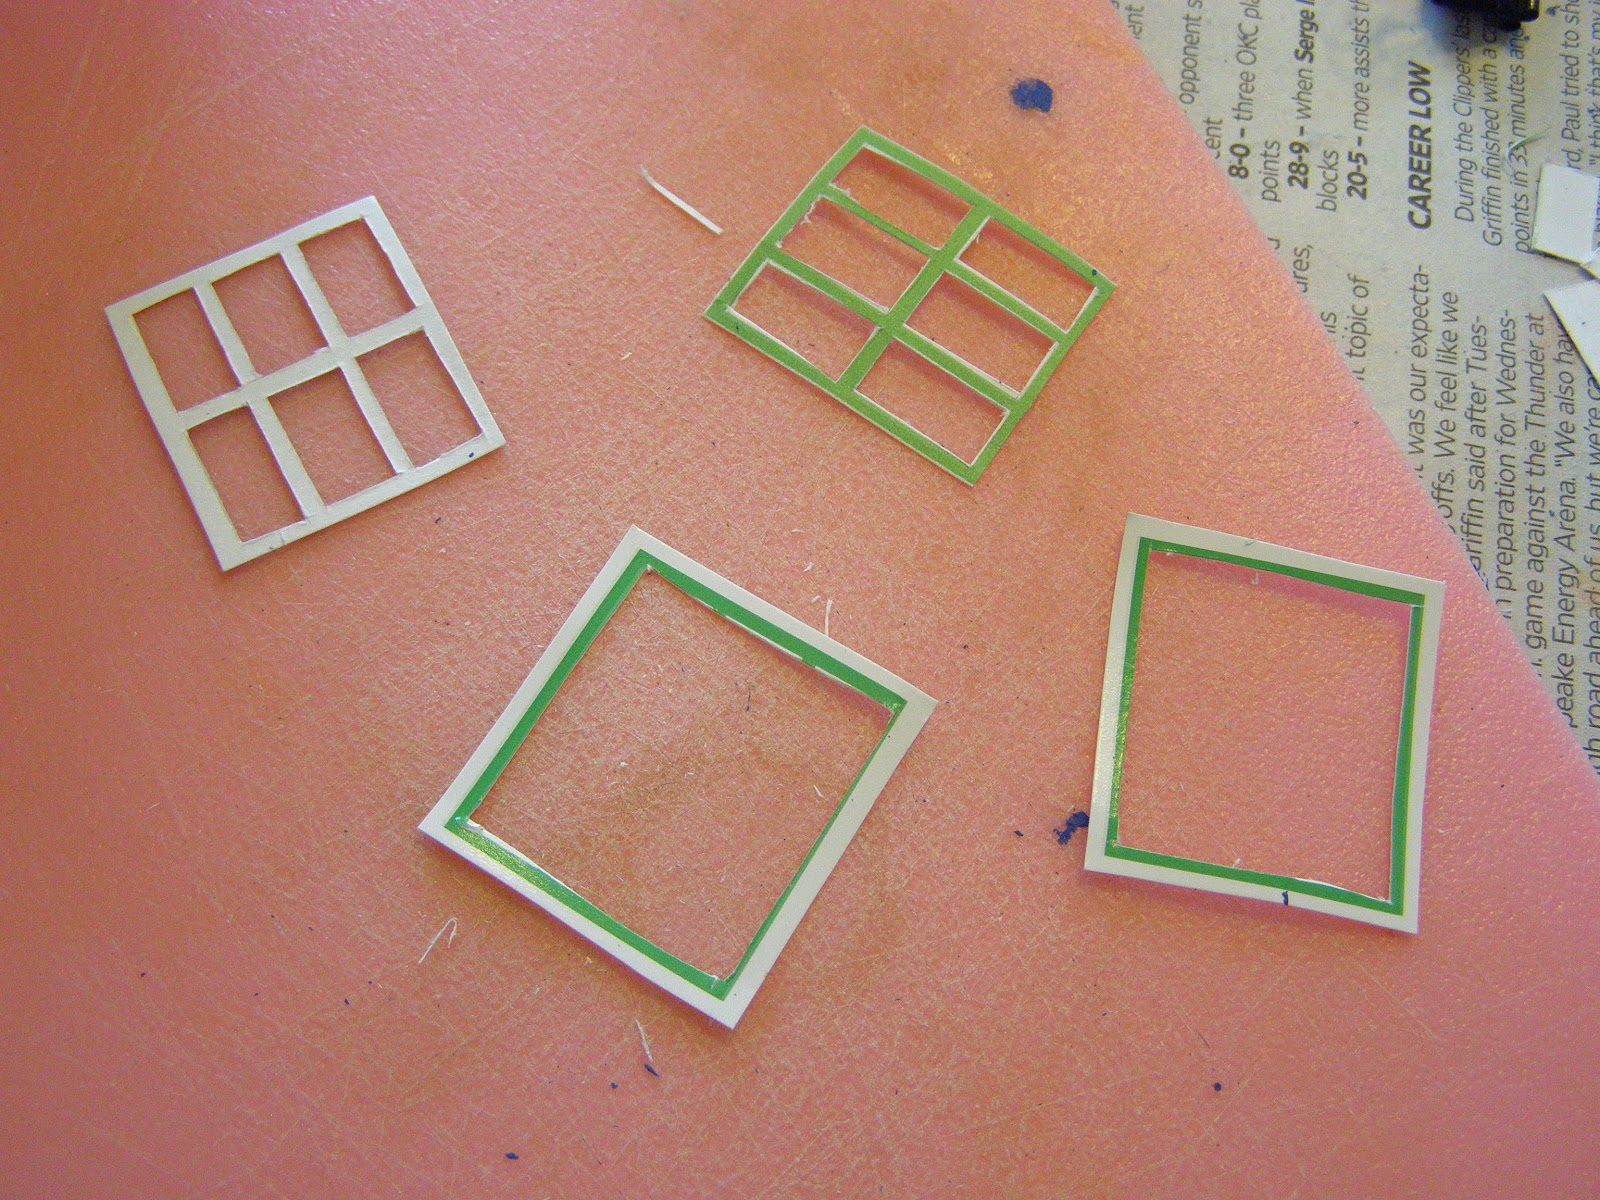
9. Make the face. 

Use the 8.5 x 11" sheet of paper to make the pig's face. I drew mine to give my printer a break, but you can find a picture on the internet and print it out. Attach the face with glue.


10. Make the structure.

Wrap some of the boxes with the marble print contact paper. Wrap the other boxes with craft paper. Use the brown marker to make wood grain designs.

11. Set it up and enjoy!

Use the boxes to make a structure. Instead of hitting this pinata with a stick, the kids took turns throwing their stuffed angry birds at it. Then the baby pushed the whole thing over. The pinata took several hits. It finally busted when we threw it straight up in the air. It was so much fun! My girls still have the crown to play with and love to set up and knock over the boxes.


Wednesday, April 18, 2012

Memory Quilts and a Preview of my Next Project

My current project is a massive king-size duvet cover I'm making for my sister. She had a rather old and stained, but still very warm comforter and an impressive amount of sentimental T-shirts lying around- the perfect recipe for a memory quilt!

What is a Memory Quilt?

A Memory Quilt Made From My Daughter's Baby Clothes
Memory Quilts are patchwork quilts made from materials that have sentimental value. They can be very elaborate or simple. The quilts can be given as a gift, made in memory of a loved one, or serve as a textile scrapbook.

 For an amazing children's book about memory quilts, check out The Name Quilt by Phyllis Root.


My Memory Quilts


The first memory quilt I remember seeing was at my aunt's when I was a little girl. My sister and stayed in their spare room under a warm quilt made of old T-shirts. The T-shirts were cut to large uniform rectangles, then stitched together with a sewing machine. Instead of quilting with thread, whoever made it had dotted the corners with knotted yarn. I thought it looked pretty easy and the image stayed with me for some time.

Fast forward a few years to high school, when I was in the school's band. As a fundraiser, one of the mothers took the old uniforms and made a lap quilt. It was lovely, but I decided to embellish it further. When I graduated, I carefully removed all my patches and letters from my letterman's jacket and passed it down to my sister. I then sewed all my patches and letters to the band quilt. My mom hung it in the hall at their house for a while, but now it serves as a cozy blanket for my little girls (and a reminder of how nerdy their mother is).

Memory Quilt Process

A few quilts later, I decided to convert my pile of T-shirts into a memory quilt of my own. That first quilt began a learning process that I'm still employing and perfecting now.

1. Gather your stuff. 

Before I set out to do any of my memory quilts, I try to determine how much material I have to work with. I don't mean bolts and yards of fabric, but how many T-shirts (or whatever I'm using). Will I want to supplement with purchased fabric or fabric from my stash? I like lots of texture and interesting details in my quilts, so I work with odd items like bibs, snaps, lace, ruffles, varying fabric weights, etc. If uniform texture is important to you, keep that in mind as you select your materials.

2. Select a unit of measurement. 

Of course, the simplest method of doing a memory quilt is to pick one size (a square or a rectangle) and cut all your material to that same size. But if you know anything about me, you know I tend to complicate things. I use what I call a "unit system", if there is an official name for it feel free to correct me. Instead of cutting all my pieces to the same exact size, I choose a standard "unit" size. Then I cut my pieces to the nearest whole unit. Think of it like LEGO blocks. The smallest LEGO pieces have only 1 bump on the top- 1 x 1 units. A LEGO piece with 3 bumps would then be 3 x 1 units or 1 x 3 units, etc. By using these units, I am able to accommodate various sizes of T-shirts and other materials into my quilts.
My T-shirt Memory Quilt Using Units

I take two things into account when choosing my measurements: the finished quilt size I desire and the size of the decorations on my materials. For example, I wanted to make two 40" x 60" quilts. One of them would be using my T-shirts, the other my daughter's baby clothes. My T-shirts have much larger designs, so I used a 6" square as my basic "unit". For the baby clothes, I went with a 4" square.

By using a "unit" system I am able to accommodate pretty much any shape or size design. One of my sister's T-shirts had a beautiful white tiger design on a royal blue background that I did not want to mess up, so I was able to use it as a whole, large piece- 4 x 4 units. Her husband's beloved sweatshirt had a design running the entire length of a sleeve- 1 x 5 units.

3. Cut the pieces.


When cutting the units I always add a generous seam allowance of 1/2" because of the difference in fabric weights and the propensity of some fabrics to fray easily. For each piece, regardless of unit size, I cut 1" larger than the unit. So for one side of the tiger shirt: 1/2" seam allowance + (4 units x 4" per unit) + 1/2" seam allowance = 17" cut size. For the sweatshirt sleeve: 1/2" seam allowance + (1 unit x 4" per unit) + 1/2" seam allowance = 5" wide, 1/2" seam allowance + (5 units x 4" per unit) + 1/2" seam allowance = 21" long, cut size is 5" x 21".

Occasionally, some pieces are smaller than the basic unit size. They may be a tiny design, or have a piece missing because of an arm hole or fabric edging. When this happens, I use a complimentary fabric (or a piece of fabric from a different part of the same garment) to patch the holes. If you look closely at my T-shirt memory quilt (above), you'll see a light blue patch on the right side to which I had to add fabric.

 When paring down an entire T-shirt to a unit system, keep the placement of the design in mind. I use a clear ruler so that my cut pieces will have the designs centered on them as much as possible.

4. Determine if you need to supplement your material or pare it down.

Math is your friend, I promise. I usually do this step in conjunction with step 3. First, determine how many square units you will need. For an oversize lap quilt of 40" x 60" with a 4" unit size, I needed 10 x 15 units or 150 square units. For this next project, a massive king-size duvet cover, the desired finished size is 80" x 96". Since I'm using a 4" unit size, that will be 20 x 24 units (80" / 4" per unit x 96" / 4" per unit), or 480 square units.

As I cut my pieces, I keep a running total of the square units I have so far. For example, my sister's tiger shirt had 16 square units (4 x 4), and the sweatshirt was 5 square units (5 x 1), which gives me 25 square units.

After you've cut your pieces, you will know if you have too much or too little. If you have way too much, consider making your quilt larger, putting the extra pieces on the back, or making a second quilt. If you have just a little too much, you can omit some of the shabbier-looking pieces from your final design or trim down some of your pieces to a smaller unit size (trim down a 4 x 4 unit to a 3 x 4 for example).

If you don't have enough, try to be creative in finding new pieces. You can use towels, place mats, doilies, or any fabric you wish. Occasionally, T-shirt quilts can be pretty colorless if you have mostly white or grey shirts. Feel free to add patches of color that draw out and complement the colors of the designs of your shirts. Or you can use it as an opportunity to clean out your stash a little.

5. Arrange the pieces. 

Quilt Units in Graph Paper Form
If you like puzzles, this will be the fun part. Once you have your pieces cut, lay them out into a final arrangement. For my T-shirt quilt and the baby clothes quilt, I simply spread all the pieces on the ground and played with them until I reached an arrangement I liked. Keep the seam allowance in mind, it will throw you off if you go by the pieces' actual size rather than the number of units.

For a much larger and more complicated quilt, laying the pieces out is not really an option. For my sister's duvet cover, I kept track of the pieces I cut and made scaled down versions on graph paper. I made a couple different arrangements before I started losing the tiny little pieces and/or messing them up every time I breathed. You can imagine the frustration. (By the way, I believe the tiger shirt is the big blue one in the top center of the quilt in the above picture).

Then I switched to drawing the pieces directly onto the graph paper, which was much easier, but still took a fair amount of time. And this is where I'm stuck on this project. I've got 6 options for the final layout and can't choose between them. I'd like a second opinion. I'll have a survey running on my blog for the next two weeks or so (until May 2, 2012) where you all will get to vote on which layout you like.

6. Sew it together.

To save time, I pieced my quilts together using the sewing machine. I'll let you know how it works out with this huge one. My advice on this? Plan your route. Look at your design and try to join the pieces together into large blocks with long seams. Draw it out with labels marking which order you will sew the seams in.

For the quilts, I added batting and backing. Since the fabric I used was old and worn in some places, I added a second layer of backing between the batting and the quilt top. If any of the pieces frayed or got threadworn, the second layer of backing would prevent the batting from being exposed. Then I used safety pins to hold the layers together while I quilted from the center of the quilt outward. I do use a hoop for quilting.

Back of the T-Shirt Quilt Showing Stitches
For the T-shirt quilt, I used colored thread to hand quilt along the designs. Some of the pieces had no design, so I quilted squiggles, stripes, or circles on them. For the baby clothes quilt, I went a step further and researched some antique quilting patterns. If the piece had writing on it, the writing was usually too small to quilt, so I quilted a larger version of the same writing around it. The quilting is the most time-consuming step. Fortunately, for this next project, I'm doing a duvet cover- no quilting! Don't get me wrong, I love the quilting, but it can take months to complete. Since the king-size project is 4 times larger than my largest memory quilt, it's a bit more than I'm willing to take on.

7. Finish it. 


I think this is the most important step for any project. Get it done! My personal rule is only one project at a time (of course, I break that rule sometimes, okay a lot).

The T-shirt memory quilt is finished with a long fringe made from the extra pieces of shirts. T-shirt material doesn't fray and makes fringing quite simple. The baby clothes quilt is finished with a bias tape made from excess material.

If you are unfamiliar with what a duvet cover is, my apologies for not explaining sooner. It's basically a gigantic pillowcase or slipcover for your comforter that buttons shut on one end. So for this next project, I'll piece the quilt top together, sew it to the backing on 3 sides, and add buttons or snaps on one end to close it. I'll keep you updated with my progress.

Current Project Vote

Here are the options for the duvet cover for your voting pleasure:

In case you were wondering, the tiger shirt is piece #7, and the sweatshirt sleeve is piece #10. 


Option 1: Dark Center Fading to Light Edges

Option 2: Dark Top Fading to Light Bottom

Option 3: Dark Edges Fading to Light Center

Option 4: Large Blocks at the Bottom, Small Blocks at the Top, Scattered Colors

Option 5: Pieces Arranged into Large Blocks of Like Colors

Option 6: Diagonal Rainbow Fading to White in Lower Right Corner


Wednesday, April 11, 2012

Making a TARDIS Jewelry Box or Key Chest

Finished TARDIS Wooden Box
This TARDIS project was started when I did the gift box. I really wanted to do one that was a little more sturdy and practical. Using a store-bought wooden box as a base, I added front panels, a beacon, and an interior to look like the TARDIS. This box serves as a jewelry box or key chest with hooks on the interior.

Materials:

  • Store-bought wooden box measuring about 7 1/4" x 4 1/4" (I got mine from Hobby Lobby for around $3 and used a coupon on it- super cheap!)
  • Wood Filler
  • Blue Acrylic Craft Paint ( I used Americana's True Blue, but I think it looks way too bright in some lighting)
  • Metallic Copper Acrylic Craft Paint
  • Light Bulb- Fortunately my husband was changing a headlight this weekend, so I got an awesome-looking bulb. If you don't want to rip out your headlights, you can always use a nightlight bulb or see my other TARDIS for how to use a miniature hand sanitizer cap. 
  • Card Stock
  • Photo Paper
  • Vellum
  • Plastic Wrap, approx. 2" x 3"
  • Black Trash Bag Piece, approx. 2" x 3"
  • Brass Cup Hooks x 2

Preparing to Fill
Wood Filler Applied


Sanding


  1. Prepare the box. 

 I grabbed the last box the craft store had in stock and it had a big crack down the middle of the lid. Had it been in the center, I would have incorporated it to the design as the seam between the TARDIS's doors. However, it was just enough off center to be useless. So my first order of business was filling and sanding it.

Finer Sanding


 2. Paint it Blue!

Perhaps I got a little ahead of myself on this step. What I did: painted the box blue, then drilled the hole for the beacon/light bulb. What I recommend: drill first, paint later, then add bulb. 

I also painted a whole sheet (8.5 x 11") of card stock to use as the panels. If you use this method instead of painting after assembly, I'd recommend painting parallel to the short edges of the paper instead of the long. The "paint grain" would better match the wood grain of the box.


5p Marks the Spot

 3. Drill a Hole for the Beacon. 

The headlight bulb I used was about 3/4" in diameter. I used a coin to mark the hole for drilling (and the coin I found happened to be 5p- pretty neat!) The picture at right also shows how hard it is to accurately represent this blue on screen.


Clamped in Place
It fits!
I used a large drill bit to make the hole, then a Dremel tool to widen it. See the big scratch? This is why you should paint AFTER you use the power tools. No worries, I was able to touch it up with a little paint. After installing the beacon, I glued it in place with a hot glue gun.


TARDIS Interior

 4. Paint the Interior. 

I happened to have a great copper patio paint on hand, so I used that for the interior of my TARDIS. Being slightly metallic, it helped ease the transition between wooden exterior and the photo I'm using on the large panels on the interior. You could use the photo on every surface, but I decided the paint would be easier and look much cleaner.


Photo Printed and Ready to Cut

5. Install the Interior Photo. 

I printed a picture of the TARDIS's interior (which I found at Geek Syndicate) using my color printer and photo paper. I cut two large pieces to fit the inside of the lid and the back of the box.  Then I glued them in place.

TARDIS Interior Glued in Place


Using the Template

6. Cut the Panels from the Painted Card Stock. 

Like my other TARDIS project, I used multiple layers of card stock to achieve the wood panel look. I also used the same cutting template. The lower layer had the door panels and window openings removed from it. The upper layer is just a frame on three sides. Since this TARDIS has only one decorated side, I only cut one set of door panels.

Door Panels Almost Cut


I glued a small rectangle of plastic wrap and a small rectangle of black plastic bag to the reverse side of the top two openings (see my other TARDIS for more detail) to serve as the window "glass." I glued the 2 panels onto the front of the box, smoothing the wrinkles with my finger.

 7. Make the Beacon Casing. 

Unlike the other TARDIS, I added a casing to the beacon on this one. I drew a grid on the back of the excess painted card stock. In the center is the hole for the light bulb surrounded by a square. Then I added a 1/4" border, 1/4" for the casing's sides, and rounded tabs to attach it to the top of the TARDIS. The small side tabs are folded in and glued. The round tabs are trimmed and folded under.

 
Grid for Casing
All Cut Out


Using Paper Clips to Glue the Side Tabs in Place

Both Sides Clamped in Place

Casing Box as Viewed from the Bottom

Finished Casing

 8. Attach the Beacon Casing. 

I folded the round tabs under and glued the casing in place. It was a perfect fit. Yay!


9. Attach the Window Frames and Signs.

Window Frames are Too Small

At this step I ran into a little bit of a problem. The template I used had already been used for my other project. Over the course of having 5 panels cut from it, the openings had been widened. Which meant the window frames were too small to cover the window openings (see picture at right). 

Cutting the Double Frames
A Fully Framed Window with Frosted Panels
 Luckily I had a leftover set of window frames from the other TARDIS, so I cut a little larger than the existing frames and cut out the mullions altogether. Then I glued frosted panels made from small pieces of vellum to the wrong side of the frame with mullions. Next I glued the larger frame to the mullioned frame and glued them in place on the TARDIS.

I also glued on the iconic signs: "Police Public Call Box", "Pull to Open", and the "St. Johns Ambulance" Medallion (since this is the 11th doctor's TARDIS). For more information on these signs, check out my other TARDIS entry.

 Almost done! The process went by much faster this time since I wasn't multiplying by 4.

  10. Install the Hooks. 

The Interior of the TARDIS

Perfect for Keys or Jewelry
I used 2 brass hooks for the interior of my box. Of course you could use more and mount them to the back, but I chose to mount mine at the top. Since the threaded ends of the hooks were slightly longer than my box top was wide, I installed them directly under the beacon casing. The casing hid the ends protruding out the top. (The above pictures were in direct sun, so the blue looks REALLY bright).


 ...And it's done!


I think the next step is making one completely out of wood with real glass panels, but for now I'm going to enjoy my key box as is. (Or give it to someone for a birthday present, which is more likely).