Showing posts with label Sewing. Show all posts

Saturday, July 13, 2013

The Cheap Way to Make Throw Pillows

Abuela's PillowsOver the past couple of weeks, I have been blogging about some projects for my mother-in-law's room. Today I'm going to share with you how I made three square throw pillows for about $8.00. So here we go!

1. Gather materials. 

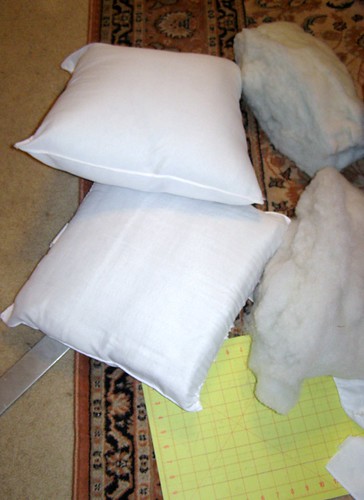
Pillow forms are expensive. Way too expensive for my tastes. So for this project I bought two $3.00 el cheapo standard bed pillows. Stuffing problem solved.
Abuela's Pillows
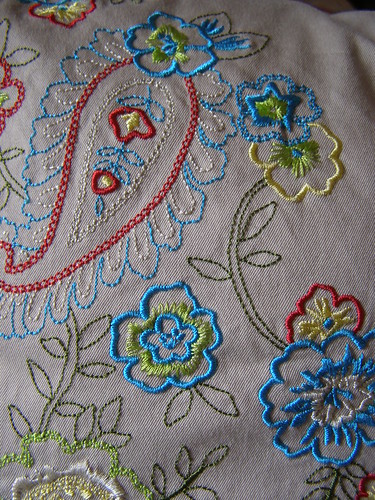
Embroidery on the Tan Skirt
For the pillow covers, I went to my local thrift store that was having a $2 bag sale. $2.00 buys all the clothing items you can stuff into a paper grocery bag. Totally worth the money. Other thrift stores have specials where a certain tag may be 10 for a dollar and so on. Recently one of our favorite kids' resale stores had a clearance sale where you could get 10 clearance items for $10. A little pricier, but I stocked up on colorful corduroy for a later project.


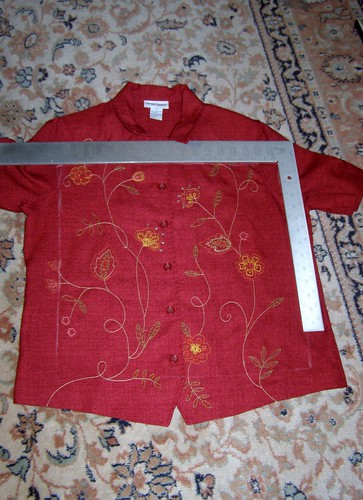
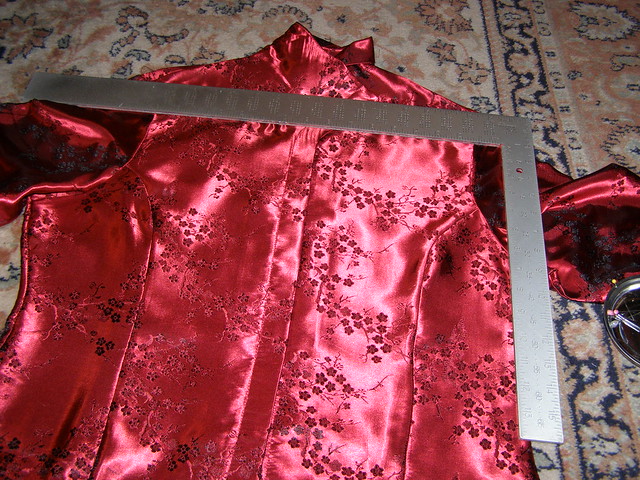
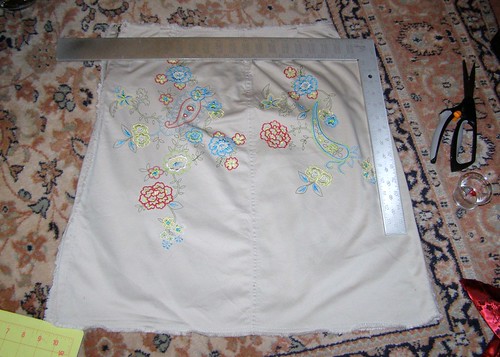
Sorry, got on a tangent there. Point being, think outside the box when looking for fabric. I found two red button-up shirts and tan skirt with gorgeous embroidery for this project. The ones I used were size 12, 14, and large, which seemed just big enough. I wouldn't recommend buying anything smaller for this particular project or you might have to do some piecework (which takes the easy and quick out of it).  I recommend washing and ironing your pieces before working with them.

2. Measure and cut.

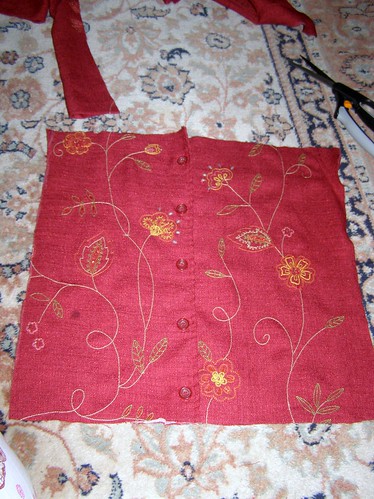
The cheapo pillows I bought were about 16" wide. I think they were technically the standard 20" x 26" size, but with the stuffing factored in, they measured more like 16". So 16" was the magic number. Factoring in a generous 1/2" seam allowance on each side, I then measured my shirts and skirt to make sure I had enough fabric for a 17" x 17" square. On the shirts, I did have go up onto the arm a little, but I had enough. The skirt, thankfully, was large enough as well. I marked the 17" square and carefully cut it out. 
Abuela's Pillows

 Abuela's Pillows

 Abuela's Pillows

 Abuela's Pillows
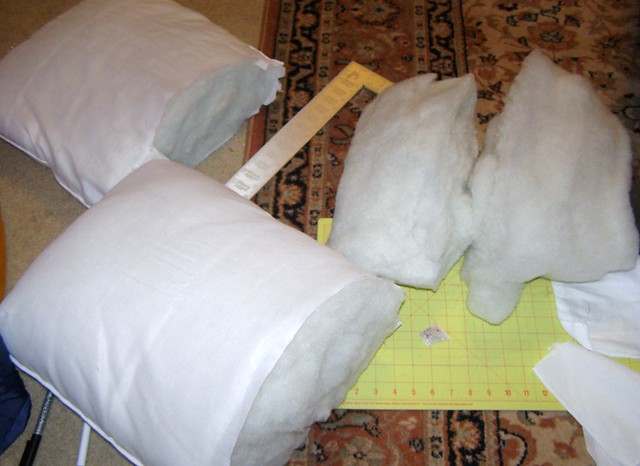
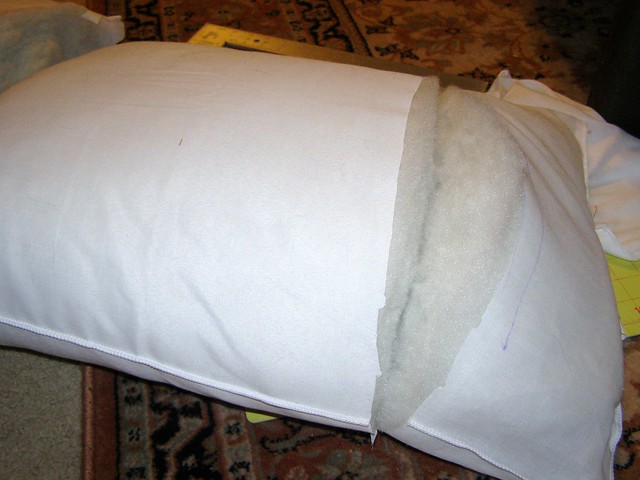
Then I measured 16" on the long side of the pillow. As I had hoped, 16" was just about 2/3 of the length. I carefully marked a line across and started cutting. Cutting through a pillow isn't really pretty, but it works. I repeated the process with the other pillow, which gave me two roughly 16" x 16" pillow squares that were sewn on three sides and two smaller rectangular pieces. (I kept the pillow casing on the larger pieces and tossed the pillow casing from the smaller pieces into the rag box).
 Abuela's Pillows

 Abuela's Pillows


3. Sew. 

I must confess I was in a bit of a hurry. My mother-in-law was due to arrive the next day and I still had a significant amount of cleaning and setting up to do. So instead of making a gorgeous hidden stitch to seal up my square pillow pieces, I did a pretty crude stitch (also, don't judge my pajama pants, as I said, it was getting late). What does it matter? You might be wondering. Well, here's the genius of my plan. The two shirts have buttons, which makes them ideal for removable and washable slipcovers. The odd little thirds I planned to stuff into the skirt without worrying about making it removable. Since I'm planning to be the one removing the slipcovers and washing them, it doesn't really matter. But if you were planning to make these pillows to give as a gift, you might pay more attention to the quality of your stitching on the inside.
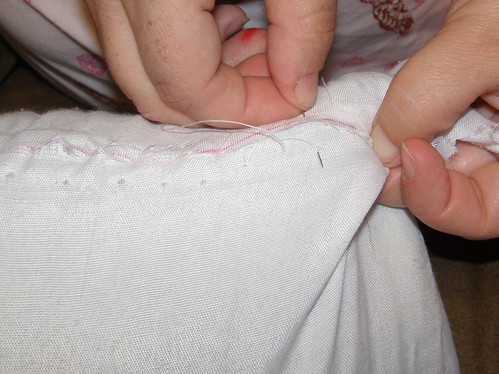
Abuela's PillowsAbuela's Pillows
Back to the covers now. After cutting them to 17" square, I turned the right sides together and pinned them. After running a test stitch on a piece of scrap fabric, I sewed the two red pillows on all four sides (knowing I could turn them right-side-out through the buttons). I added a row of zig-zag stitching around the outside to prevent fraying.
Abuela's Pillows
I then turned the red pillows the right way and stuffed them with my cheapo pillow forms.
Abuela's Pillows
After a quick thread change, I sewed the tan pillow on three sides.Abuela's Pillows
I stuffed the odd thirds into the tan pillow and pinned it shut. Then I did a hidden stitch to close up the third side.
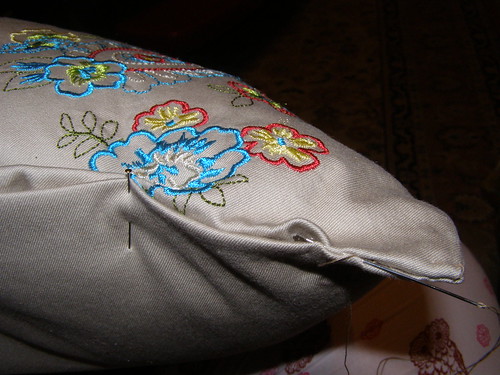
Abuela's Pillows

4. Enjoy!

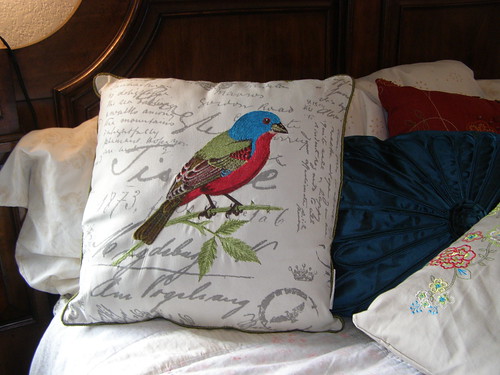
If you haven't guessed already, I love the process of making beautiful things. So before I show you the finished product, here are a couple pillows that did not pass their audition. The birdcage one, though lovely, was entirely the wrong shade of pillow. The red one was okay, but the blue accents clashed with the turquoise of the room.
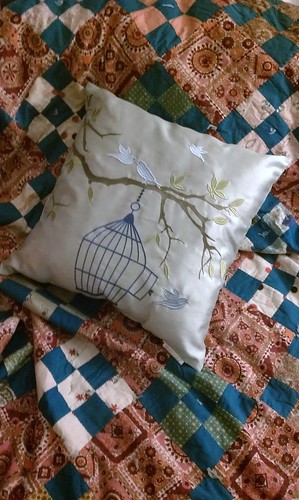
Abuela's Pillows

 Abuela's Pillows
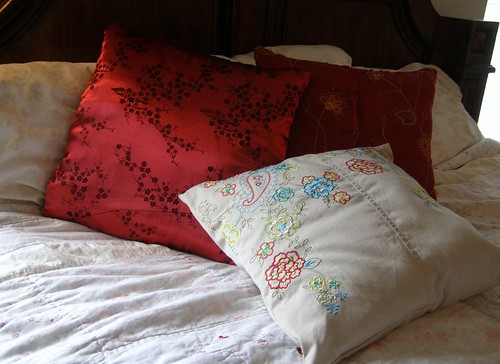
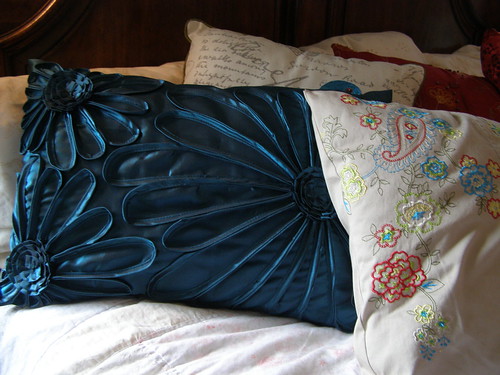
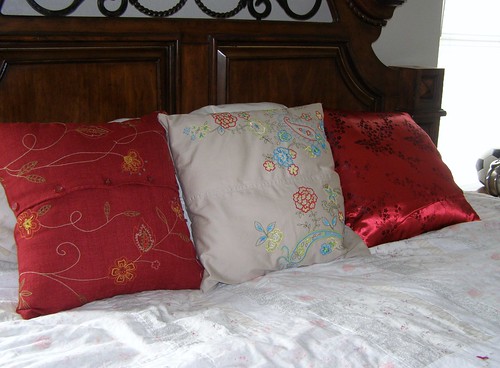
And here are the final versions of my pillows alongside the pillows I bought to accent them. (In case you are wondering, this isn't in their final location as the light in that room isn't very good for pictures).
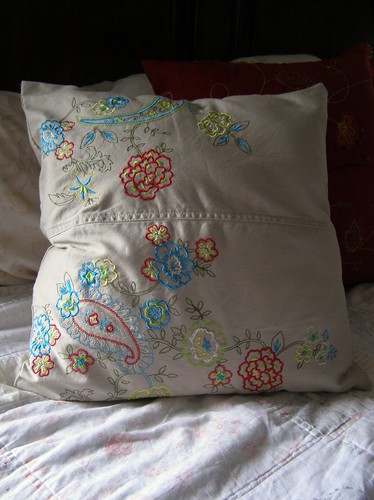
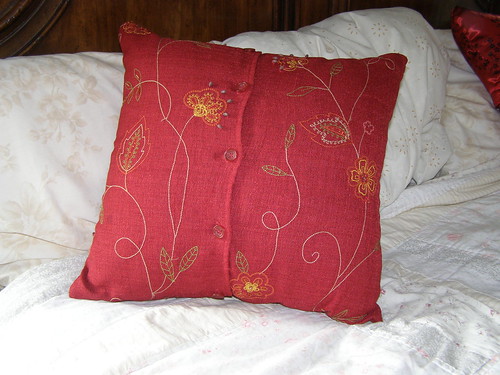
Abuela's Pillows

 Abuela's Pillows
 
Abuela's PillowsAbuela's Pillows

Abuela's Pillows

Friday, June 28, 2013

Restoring a Vintage Quilt

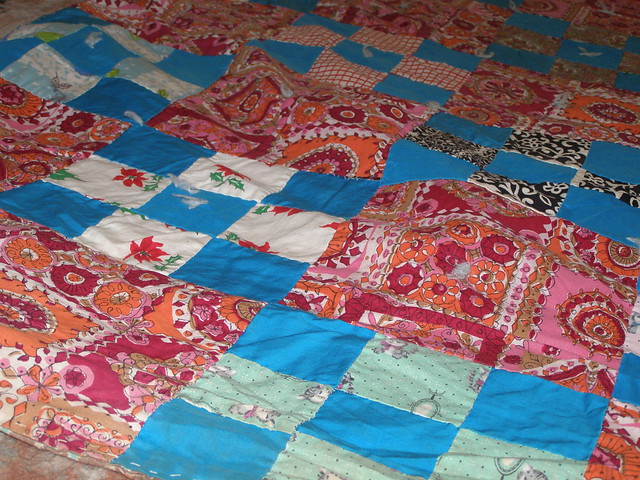
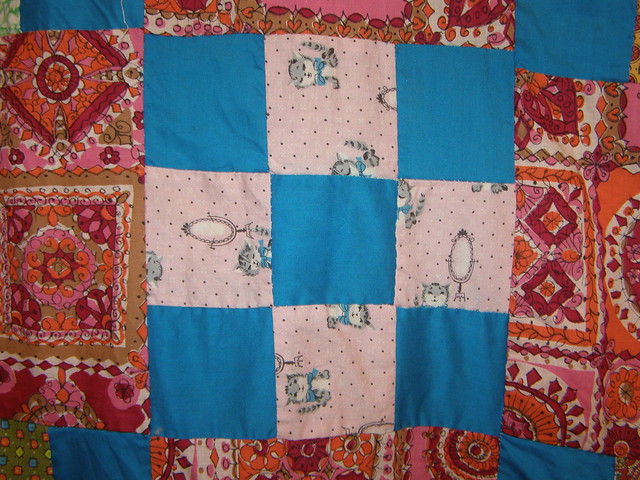
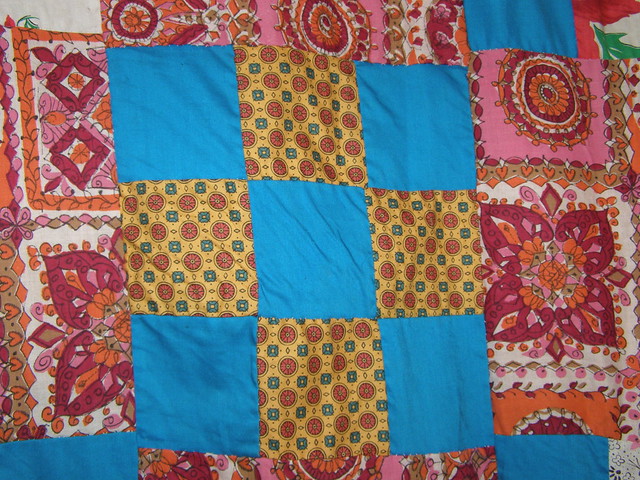
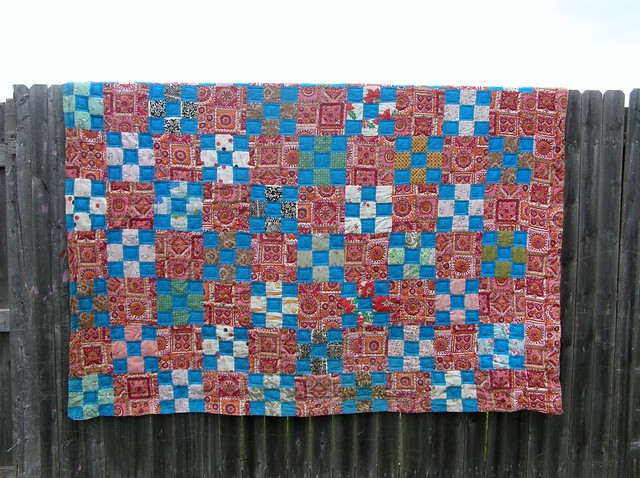
In my quest to find the perfect bedspread for my mother-in-law's new room, I came across a beautiful handmade quilt in decidedly less-than-perfect condition from Red Brick Cottage on Etsy. This quilt had a lot more history than the others I had been looking at and was cheaper. According to the description, the quilt was "created in the 1920's by the aunt of a friend" of the seller. (The aunt had provided the date.)  I knew it would take a bit of work and love to get it back to working status.

Vintage Red and Turquoise 9 Square Quilt
Before

My new project arrived bundled in plastic via the mail. I was pretty excited to get started on it, but I took a few minutes to give it a checkup before launching in. Here are the problems I identified and the solutions.

Vintage Red and Turquoise 9 Square Quilt
Dirt on the Edge


Problem #1: Dirt

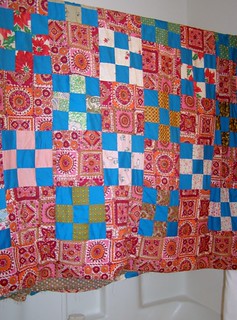
The seller was hesitant to clean the quilt, and for good reason. One edge was very fragile, the batting was clumping badly, and the colors might bleed. One edge was visibly soiled.


Vintage Red and Turquoise 9 Square Quilt
Hanging to Dry

Solution: 

I carefully removed the batting first. I planned to soak the quilt top and back in the tub in Oxi-Clean, but as soon as I got the water running, the color started running as well. I yanked the quilt out of the tub and put in in the washing machine on the hand-wash cycle with cold water. Then I hung it to dry on the shower curtain rod. Not all of the stains were removed, but at least now the quilt was clean enough to work on.


 Problem #2: Yarn Ties

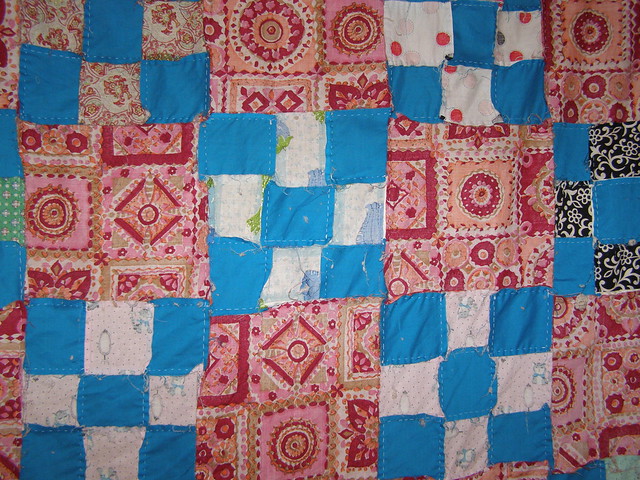
At one point, this quilt was held together with knotted pieces of yarn. Over time, the yarn had disintegrated in places, which led to other problems.
Vintage Red and Turquoise 9 Square Quilt

Vintage Red and Turquoise 9 Square Quilt 

Solution:

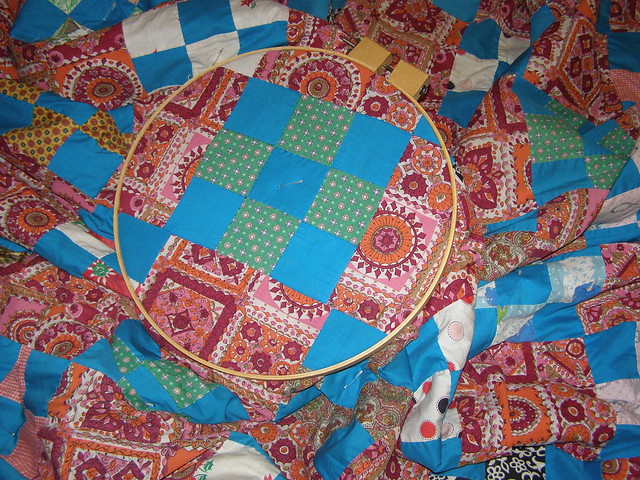
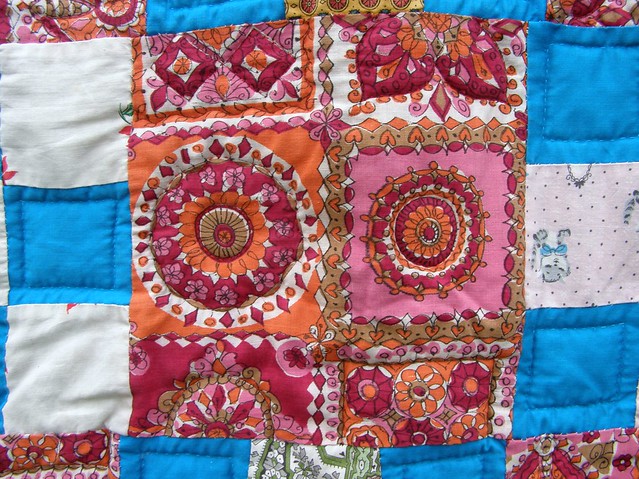
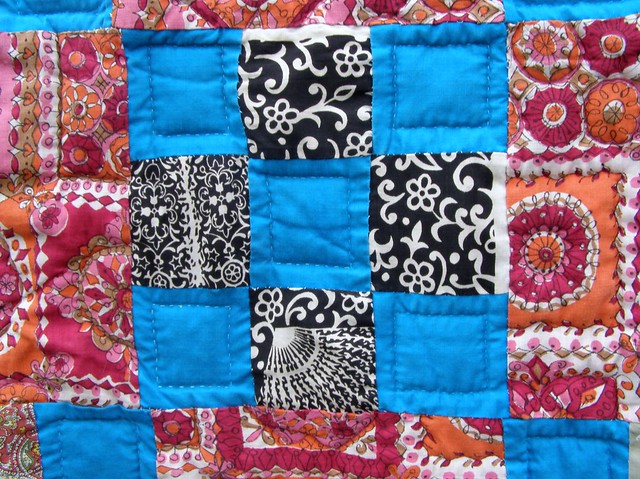
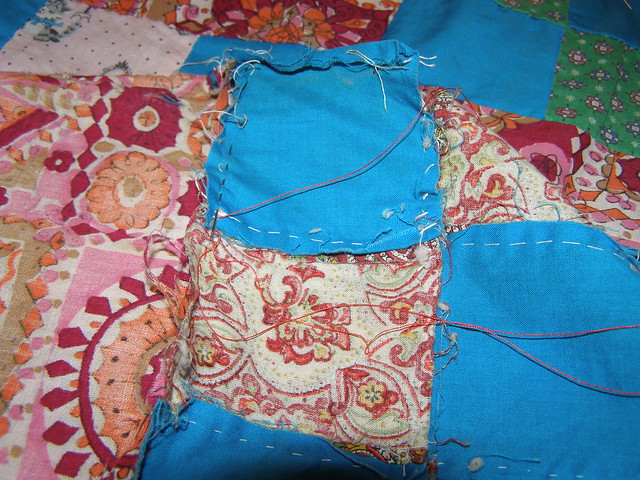
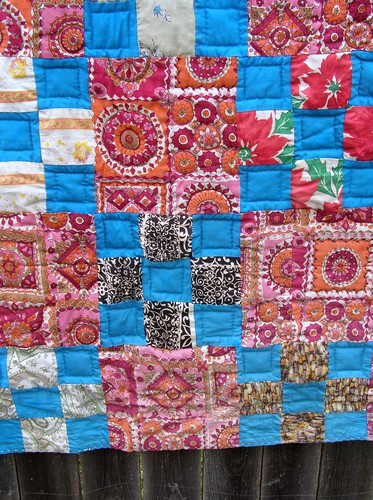
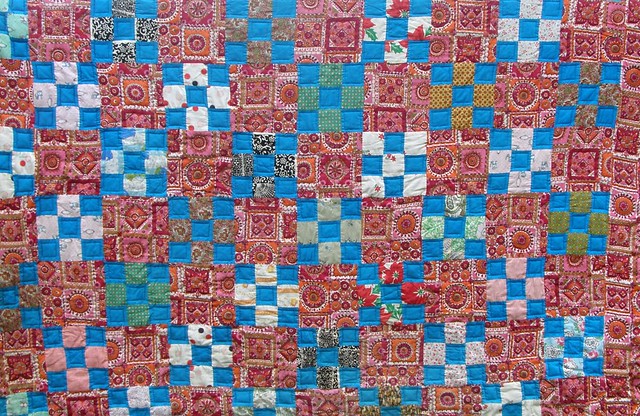
I carefully snipped off all the old yarn ties. After replacing the batting (which I will address next) I hand quilted the squares instead of using yarn ties. This was the most tedious part, but also the most fun. On the blue squares, I made a smaller blue square with matching thread. On the red parts, I used red thread to trace some of the designs that were printed on the fabric. Vintage Red and Turquoise 9 Square Quilt

Problem #3: Batting

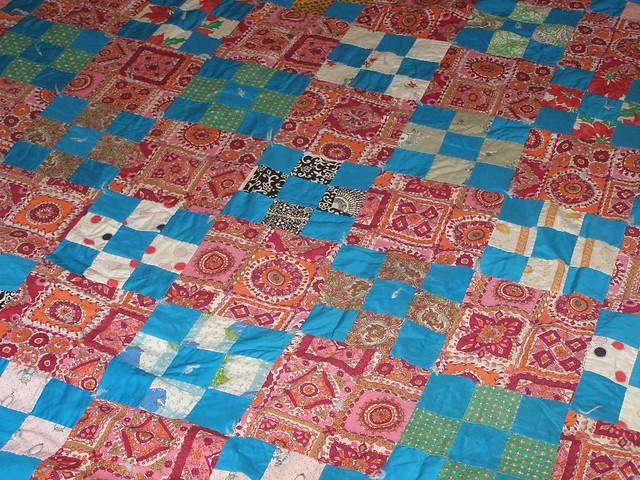
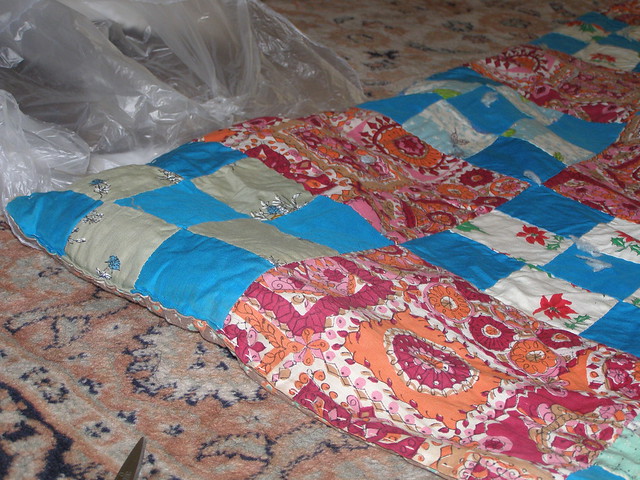
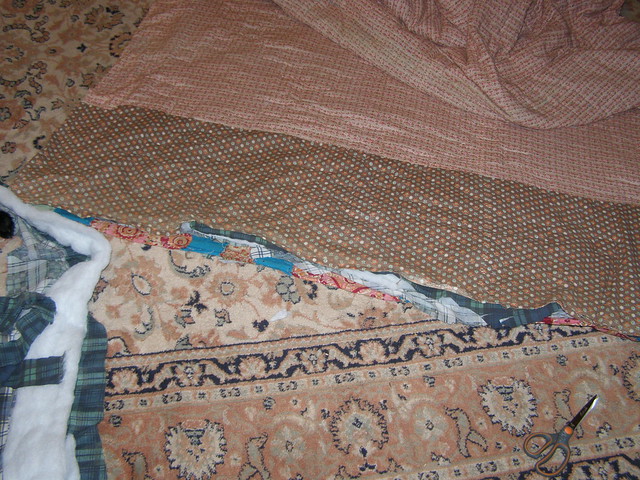
Because of the yarn tie problem, the batting had shifted considerably. Some places had no batting at all and others were up to two inches thick. Check out the pictures of the lumpiness (not the quilt is not on anything, it's that lumpy!). I decided to undo the stitching on one end of the quilt and discovered the batting was very old cotton with plant debris in it. New batting was a must.
Vintage Red and Turquoise 9 Square QuiltVintage Red and Turquoise 9 Square Quilt Vintage Red and Turquoise 9 Square Quilt

Vintage Red and Turquoise 9 Square QuiltSolution:

Vintage Red and Turquoise 9 Square Quilt
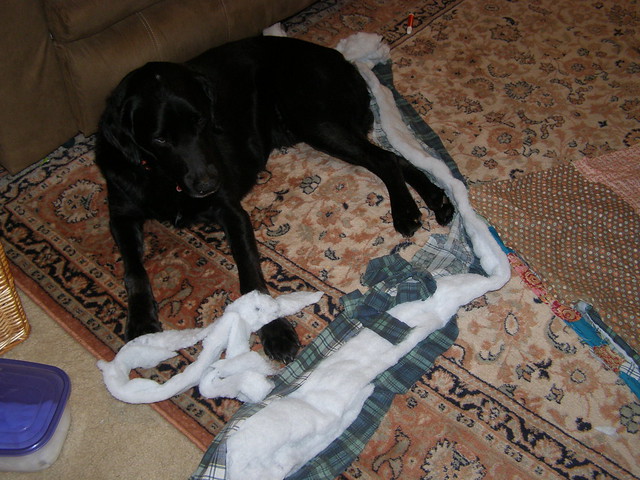
My Assistant
Well, I thought about trying to save the batting, but only for a little while. I then thought of using an old store-bought comforter I had as the batting. After doing some research, I discovered that several people were using this approach to save money on batting and to recycle old materials.  Since this quilt was very nearly a twin-size quilt, I used my twin-size comforter from college. Not only did it give added warmth and cheap batting, but the finished quilt underneath the quilt top provides a second layer of protection for the batting. 

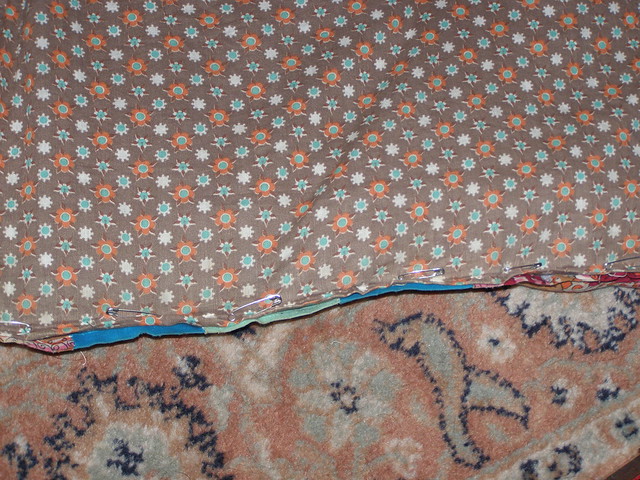
I carefully cut the stitches on one edge of the quilt and placed my quilt inside like a duvet cover. Then I fixed the burst seams (which I will discuss next). After which, I trimmed off the excess of my quilt. Then I folded the edges of the red quilt under and pinned them with safety pins. In keeping with the hand-stitched nature of this quilt, I hand stitched the edge. 

As for the batting, it sadly didn't make it. No matter how much soaking and scrubbing I did, the water drained out brown. Pretty gross.

Vintage Red and Turquoise 9 Square Quilt 


Problem #4: Burst Seams

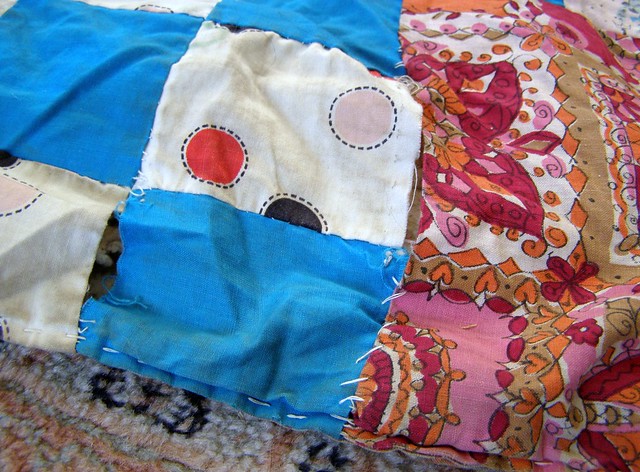
One edge of the quilt had several seams that had come undone. At some point some of these had been repaired by hand with a large diagonal stitch.  

Vintage Red and Turquoise 9 Square Quilt

Vintage Red and Turquoise 9 Square QuiltSolution: 

I removed the large stitches with a seam ripper and put in my own. Not a hard fix, just tedious.


Vintage Red and Turquoise 9 Square QuiltProblem #5: Small Holes

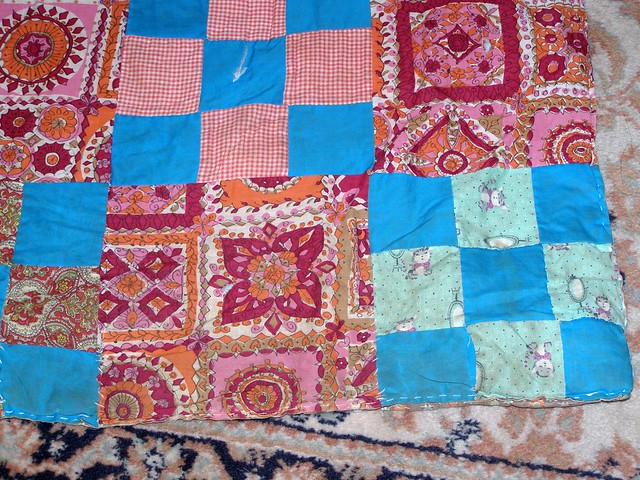
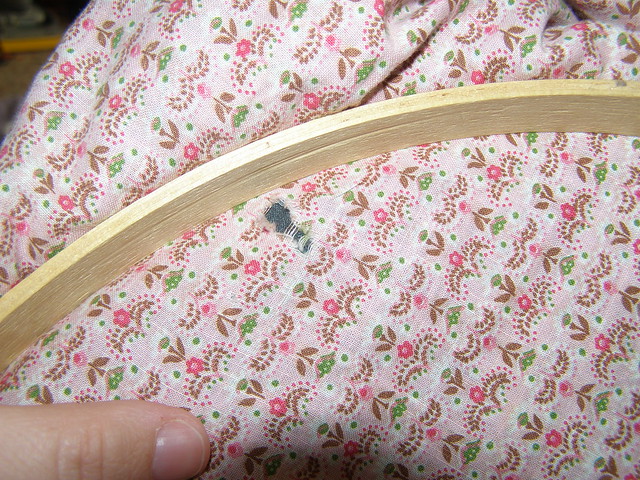
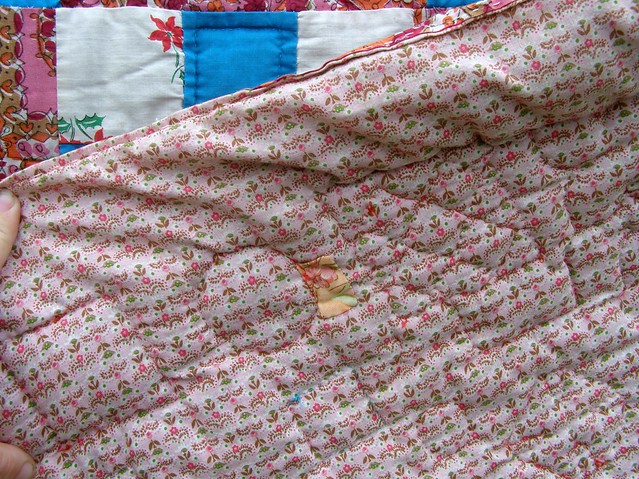
There was one small hole on the back of the quilt that could be easily patched. The main problem was the area along the edge that I had cut. In several places, the fabric had worn out pretty badly.

Vintage Red and Turquoise 9 Square Quilt
 Solution: 

When I replaced the batting, I used more seam allowance on the edge. This meant that most of the rough spots were turned under, but I did lose about an inch on the length of the quilt. I thought it a fair compromise.

The small hole on the back I patched with a small piece of fabric.


Vintage Red and Turquoise 9 Square Quilt


Vintage Red and Turquoise 9 Square Quilt

Problem #6: Fading

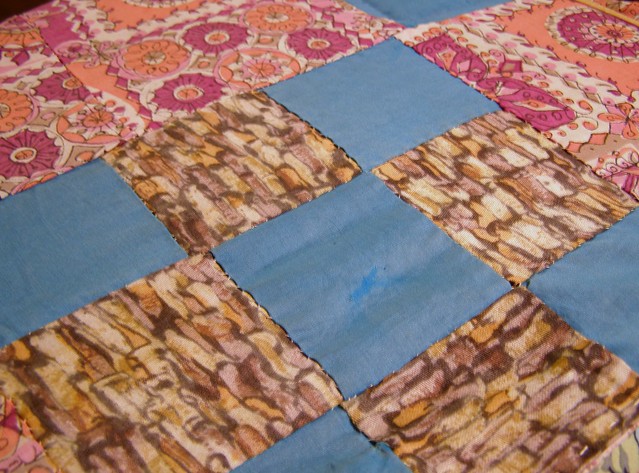
Some of the squares, particularly in one area, have faded.
In the picture at right, see where the yarn tie has been removed.

Solution:

Short of replacing the faded areas, there was nothing more I could do. I decided to leave it since it would add to the character of the quilt and the fading was not too severe.

Vintage Red and Turquoise 9 Square QuiltProblem #7: Irregularities

Based on what I've seen on this quilt, I'm guessing it was intended to be a daily use quilt and not a showpiece. The quilter who made it added strips between some of the squares to make the pieces fit. One end of the quilt has a large red strip. Most of the back is a pink fabric, but one on end is a large brown strip.

Solution:

None, really. This is where my favorite motto comes in handy: "It doesn't have to be perfect, it's Just Folk Art." All of the quirky details tell the story of the previous quilter and I, for one, don't want to remove that story. 


Now that you've seen all the issues that were remedied, check out some of the amazing things this quilt has going for it. First, it's been entirely stitched by hand. All the work I did was by hand as well.

Vintage Red and Turquoise 9 Square QuiltVintage Red and Turquoise 9 Square Quilt

There is no doubt this quilt is old, but I'm not entirely sure it's from the 1920s. I asked my mom, who thinks a few of the squares might be as new as the 1970s. I was guessing 1960s because of the red sections. What do you all think? Any clues would be greatly appreciated.
Vintage Red and Turquoise 9 Square QuiltVintage Red and Turquoise 9 Square Quilt

And finally, the reveal!

I have had fun working on this project. It had a lot of character and charm, I just added some stability and a lot of little stitches. I hope you will be inspired to take on a restoration project of your own.
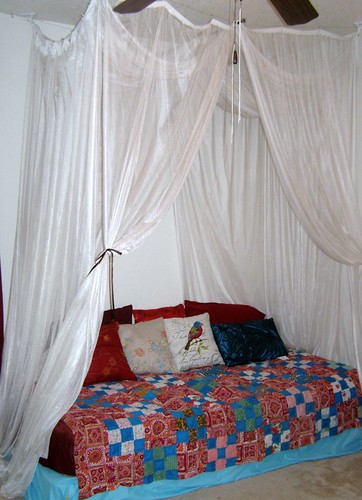
Vintage Red and Turquoise 9 Square QuiltVintage Red and Turquoise 9 Square QuiltAbuela's RoomAbuela's Quilt


Thursday, July 26, 2012

Americana Rag Rug

New Americana Rag Rug
Keeping with my rag rug obsession lately, here's another variation. So far, I've made an American Flag Rag Rug and a Union Jack Rag Rug. Earlier this year, I made a spiral version loosely based on a picture I found on Pinterest. Here's a picture of my newest rug and the one I made earlier:

Spirals Rag Rug


The colors are a lot of fun to play with. On my older rug (which was a birthday present for my sister), she picked the colors from among my scraps. The new rug is based on the colors I found in a piece of fabric, mainly bright red, navy, cream, and black.  You could do each spiral with similar colors, but I chose to integrate the colors a little more. The red spirals are fabric ropes leftover from my Union Jack Rag Rug.


Americana Rag Rug

What You'll Need:

  • Lots of scraps braided into fabric ropes (see my Rag Rug Basics post for how to make the braids).
  • Thread

1. Make the Spirals.


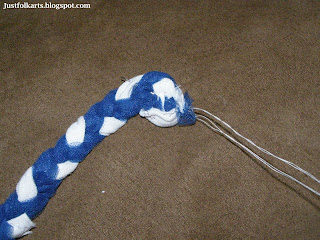
 Start with the end of a fabric rope and run a piece of thread through it.Since this will be a rug, I used a thick thread doubled over.
 Tightly coil the rope and sew back and forth to hold the spiral in place.
 Use a catch stitch to keep sewing as you wind the coil.


 Try to keep your spiral flat as you work. Some puckering can be flattened out with a rinse & a press, but not all. Having loose braids will help with this. When your spiral has reached the desired size, secure the end with a few overcast stitches and cut off the excess.


 Large spirals make great eye-catching centerpieces. You will need several small spirals (about 2" in diameter) to fill in gaps and edges. Of course, you could also do all the spirals the same size, I might have to try that next time.

2. Lay out your spirals. 

When you think you have enough, lay out the spirals in the desired pattern. I tend to change mine as I'm sewing it together. Place all the spirals with the stitched side up. I used a pillowcase for guidelines and for ease of moving. As you'll see later, the guidelines didn't quite work out as planned.
 Start stitching together using an overcast stitch. You'll probably need to rearrange as you go. The spirals will stretch some and morph into different shapes as you attach them to each other.
 Be sure to fill in any gaps as you go.

 3. And You're Done...Sort Of

Here is a great example of what to do when things don't turn out exactly as you had planned. Here is what I thought was my finished project:

 The more I looked at the pictures, the more I decided that it was simply too crooked. In this sort of rug, a certain amount of leeway on the edges is to be expected. After all, it's made of circles. However, this one is unacceptably crooked. So I'll probably be adding a few more pieces to it, then taking the pictures again. I'll let you know how it turns out. This one will be up for grabs in my Etsy shop once I'm satisfied with how it looks.