 |
| Finished TARDIS Wooden Box |
|
This TARDIS project was started when I did the gift box. I really wanted to do one that was a little more sturdy and practical. Using a store-bought wooden box as a base, I added front panels, a beacon, and an interior to look like the TARDIS. This box serves as a jewelry box or key chest with hooks on the interior.
Materials:
- Store-bought wooden box measuring about 7 1/4" x 4 1/4" (I got mine from Hobby Lobby for around $3 and used a coupon on it- super cheap!)
- Wood Filler
- Blue Acrylic Craft Paint ( I used Americana's True Blue, but I think it looks way too bright in some lighting)
- Metallic Copper Acrylic Craft Paint
- Light Bulb- Fortunately my husband was changing a headlight this weekend, so I got an awesome-looking bulb. If you don't want to rip out your headlights, you can always use a nightlight bulb or see my other TARDIS for how to use a miniature hand sanitizer cap.
- Card Stock
- Photo Paper
- Vellum
- Plastic Wrap, approx. 2" x 3"
- Black Trash Bag Piece, approx. 2" x 3"
- Brass Cup Hooks x 2
 |
| Preparing to Fill |
 |
| Wood Filler Applied |
|
 |
| Sanding |
1. Prepare the box.
I grabbed the last box the craft store had in stock and it had a big crack down the middle of the lid. Had it been in the center, I would have incorporated it to the design as the seam between the TARDIS's doors. However, it was just enough off center to be useless. So my first order of business was filling and sanding it.
 |
| Finer Sanding |
2. Paint it Blue!
Perhaps I got a little ahead of myself on this step. What I did: painted the box blue, then drilled the hole for the beacon/light bulb. What I recommend: drill first, paint later, then add bulb.
I also painted a whole sheet (8.5 x 11") of card stock to use as the panels. If you use this method instead of painting after assembly, I'd recommend painting parallel to the short edges of the paper instead of the long. The "paint grain" would better match the wood grain of the box.
 |
| 5p Marks the Spot |
3. Drill a Hole for the Beacon.
The headlight bulb I used was about 3/4" in diameter. I used a coin to mark the hole for drilling (and the coin I found happened to be 5p- pretty neat!) The picture at right also shows how hard it is to accurately represent this blue on screen.
 |
| Clamped in Place |
 |
| It fits! |
I used a large drill bit to make the hole, then a Dremel tool to widen it. See the big scratch? This is why you should paint AFTER you use the power tools. No worries, I was able to touch it up with a little paint. After installing the beacon, I glued it in place with a hot glue gun.
 |
| TARDIS Interior |
4. Paint the Interior.
I happened to have a great copper patio paint on hand, so I used that for the interior of my TARDIS. Being slightly metallic, it helped ease the transition between wooden exterior and the photo I'm using on the large panels on the interior. You could use the photo on every surface, but I decided the paint would be easier and look much cleaner.
 |
| Photo Printed and Ready to Cut |
5. Install the Interior Photo.
I printed a picture of the TARDIS's interior (which I found at
Geek Syndicate) using my color printer and photo paper. I cut two large pieces to fit the inside of the lid and the back of the box. Then I glued them in place.
 |
| TARDIS Interior Glued in Place |
 |
| Using the Template |
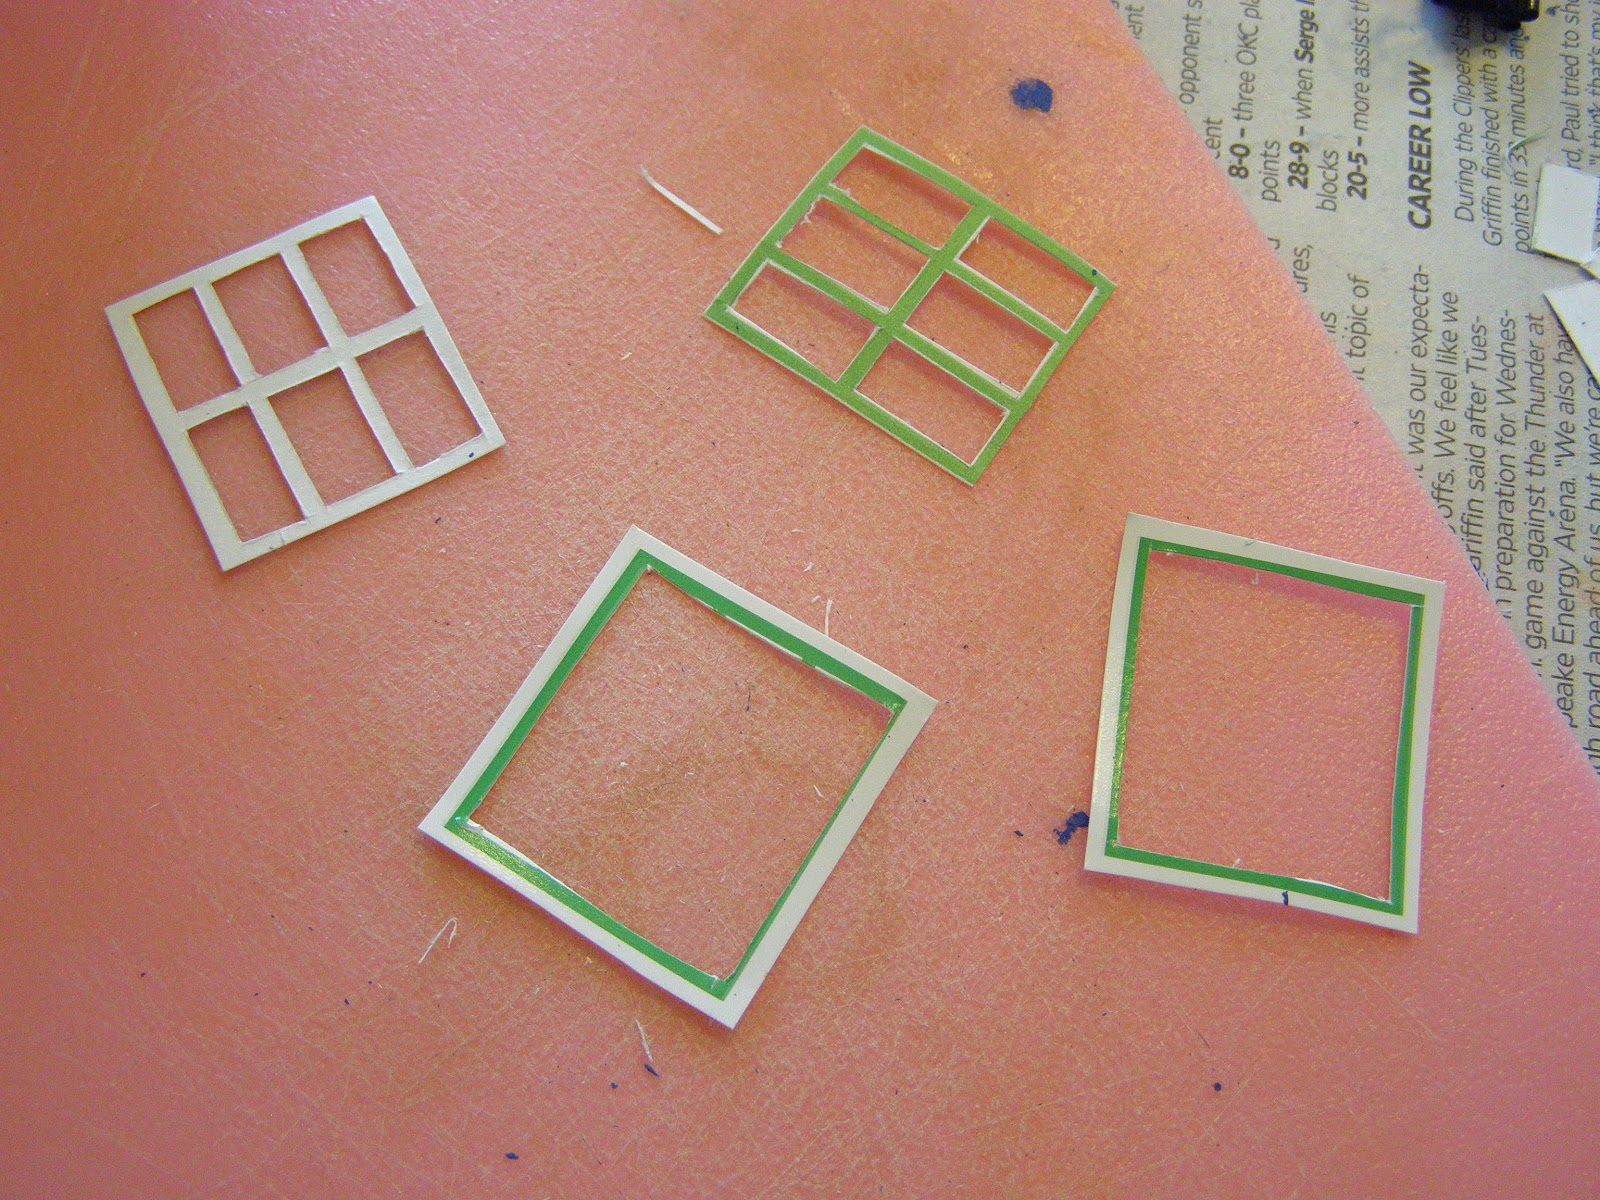
6. Cut the Panels from the Painted Card Stock.
Like my other TARDIS project, I used multiple layers of card stock to achieve the wood panel look. I also used the same cutting template. The lower layer had the door panels and window openings removed from it. The upper layer is just a frame on three sides. Since this TARDIS has only one decorated side, I only cut one set of door panels.
 |
| Door Panels Almost Cut |
I glued a small rectangle of plastic wrap and a small rectangle of black plastic bag to the reverse side of the top two openings (see my other TARDIS for more detail) to serve as the window "glass." I glued the 2 panels onto the front of the box, smoothing the wrinkles with my finger.
7. Make the Beacon Casing.
Unlike the other TARDIS, I added a casing to the beacon on this one. I drew a grid on the back of the excess painted card stock. In the center is the hole for the light bulb surrounded by a square. Then I added a 1/4" border, 1/4" for the casing's sides, and rounded tabs to attach it to the top of the TARDIS. The small side tabs are folded in and glued. The round tabs are trimmed and folded under.
 | |
| Grid for Casing |
 |
| All Cut Out |
 |
| Using Paper Clips to Glue the Side Tabs in Place |
 |
| Both Sides Clamped in Place |
 |
| Casing Box as Viewed from the Bottom |
 |
| Finished Casing |
8. Attach the Beacon Casing.
I folded the round tabs under and glued the casing in place. It was a perfect fit. Yay!
9. Attach the Window Frames and Signs.
 |
| Window Frames are Too Small |
At this step I ran into a little bit of a problem. The template I used had already been used for my other project. Over the course of having 5 panels cut from it, the openings had been widened. Which meant the window frames were too small to cover the window openings (see picture at right).
 |
| Cutting the Double Frames |
 |
| A Fully Framed Window with Frosted Panels |
Luckily I had a leftover set of window frames from the other TARDIS, so I cut a little larger than the existing frames and cut out the mullions altogether. Then I glued frosted panels made from small pieces of vellum to the wrong side of the frame with mullions. Next I glued the larger frame to the mullioned frame and glued them in place on the TARDIS.
I also glued on the iconic signs: "Police Public Call Box", "Pull to Open", and the "St. Johns Ambulance" Medallion (since this is the 11th doctor's TARDIS). For more information on these signs, check out my other TARDIS entry.
Almost done! The process went by much faster this time since I wasn't multiplying by 4.
10. Install the Hooks.
 |
| The Interior of the TARDIS |
 |
| Perfect for Keys or Jewelry |
I used 2 brass hooks for the interior of my box. Of course you could use more and mount them to the back, but I chose to mount mine at the top. Since the threaded ends of the hooks were slightly longer than my box top was wide, I installed them directly under the beacon casing. The casing hid the ends protruding out the top. (The above pictures were in direct sun, so the blue looks REALLY bright).
...And it's done!
I think the next step is making one completely out of wood with real glass panels, but for now I'm going to enjoy my key box as is. (Or give it to someone for a birthday present, which is more likely).


This is fantastic!!
ReplyDeleteOh, this is so cool!
ReplyDeleteThank you very much for the great tutorial! =)
Thanks!
DeleteThis is so amazing!! Thank you! From a totally devoted Doctor Who fan! <3
ReplyDelete