Showing posts with label America. Show all posts

Monday, November 19, 2012

Waxing Poetical on Wisteria

Soon I'll be posting the second entry in the showcase of projects my husband completed recently. But first, would you like to hear the long story behind it? Of course you would. If not, scroll through to the next post.

My Wisteria and Rose Bouquet
Have you ever been to the Albuquerque Botanical Gardens? (See, told you it was a long story.)  If you have, you probably would not forget the Ceremonial Rose Garden. For those of you who haven't been, the rose garden features a very large arbor covered with the most beautiful and delicate lavender flowers that cascade like grapes. I fell in love with that garden from the moment I first saw it. Everything from the copper roof accents to the gnarly trunks of the vines was beautiful. I decided then that wisteria was my favorite flower (even featuring it in my wedding bouquet, see picture at left).

You may remember we lived in England for a time and I LOVED it. One of the things that England is rightly famous for is the beautiful gardens. I don't know if it's because of the rich soil, the gentle misty winters, or a combination of both.

Case in point: in England I had two rosemary bushes that grew almost like weeds. I trimmed and shaped them like hedges and had plenty of rosemary for cooking. Here, I have unsuccessfully planted and soon after killed two rosemary bushes. Now I have a pathetic sickly-looking one in a pot on my windowsill. That seems to be the only way I can keep them alive. I digress.

Back to wisteria- one of our regular commutes in England meandered through a village. It was not a particularly old or beautiful village when compared to the pristine ones you find on postcards (although those do exist and are marvelous), but it was the sort of village where life continued to plod along. Buildings were more likely to be mended than replaced. When new buildings were added, the most recent being in the late 1970s or early 1980s by my rough guess, they were done so in entire streetfuls so that you had three or four streets full of older houses across from a whole block of ugly apartment buildings. Instead of ruining the older houses, the apartments seemed to heighten their beauty by contrast. On one side, you had an ideal of what, to an American like me, I would assume all of England would look like. On the other, with the apartments, was the stark realization that life progressed. People needed inexpensive housing, just as they do in America, and so the utilitarian housing units were brought in to serve that purpose.

On the side with the older houses, which mind you weren't incredibly old, just old enough to be cute, was one house in particular that was covered with wisteria. I loved that house. In the winter it wasn't much. The vines lay dormant, swirled and intertwined like a Celtic braid. In the spring, the vines suddenly brought forth the most amazing display of light purple and white flowers, completely blanketing the front of the house.

So when we moved here and bought our current house, I started messing with the garden right away. I was determined to slowly but surely transform our yard into a beautiful English garden, complete with a wisteria-covered wall. So finally I purchased a little wisteria plant and put it next to my big empty wall in front of a decorative trellis. It bloomed and thrived, but the poor thing could not attach itself to the wall. Go figure, vinyl siding is not as wisteria-friendly as brick (probably a good thing, too, I can just picture the little tendrils working their way between the panels. So plan B- look it up on Pinterest! My husband and I (he's actually a more avid pinner than I am) both did some research, sketched out our ideas, collaborated, and finally agreed upon a design. Hopefully not long after Thanksgiving I'll be posting what we did.

P.S. Sorry for waxing poetical tonight. This is National Novel Writing Month and I'm forcing myself not to participate because I'm overbooked. All that pent-up literary creativity had to get dumped somewhere, right? 


Thursday, July 26, 2012

Americana Rag Rug

New Americana Rag Rug
Keeping with my rag rug obsession lately, here's another variation. So far, I've made an American Flag Rag Rug and a Union Jack Rag Rug. Earlier this year, I made a spiral version loosely based on a picture I found on Pinterest. Here's a picture of my newest rug and the one I made earlier:

Spirals Rag Rug


The colors are a lot of fun to play with. On my older rug (which was a birthday present for my sister), she picked the colors from among my scraps. The new rug is based on the colors I found in a piece of fabric, mainly bright red, navy, cream, and black.  You could do each spiral with similar colors, but I chose to integrate the colors a little more. The red spirals are fabric ropes leftover from my Union Jack Rag Rug.


Americana Rag Rug

What You'll Need:

  • Lots of scraps braided into fabric ropes (see my Rag Rug Basics post for how to make the braids).
  • Thread

1. Make the Spirals.


 Start with the end of a fabric rope and run a piece of thread through it.Since this will be a rug, I used a thick thread doubled over.
 Tightly coil the rope and sew back and forth to hold the spiral in place.
 Use a catch stitch to keep sewing as you wind the coil.


 Try to keep your spiral flat as you work. Some puckering can be flattened out with a rinse & a press, but not all. Having loose braids will help with this. When your spiral has reached the desired size, secure the end with a few overcast stitches and cut off the excess.


 Large spirals make great eye-catching centerpieces. You will need several small spirals (about 2" in diameter) to fill in gaps and edges. Of course, you could also do all the spirals the same size, I might have to try that next time.

2. Lay out your spirals. 

When you think you have enough, lay out the spirals in the desired pattern. I tend to change mine as I'm sewing it together. Place all the spirals with the stitched side up. I used a pillowcase for guidelines and for ease of moving. As you'll see later, the guidelines didn't quite work out as planned.
 Start stitching together using an overcast stitch. You'll probably need to rearrange as you go. The spirals will stretch some and morph into different shapes as you attach them to each other.
 Be sure to fill in any gaps as you go.

 3. And You're Done...Sort Of

Here is a great example of what to do when things don't turn out exactly as you had planned. Here is what I thought was my finished project:

 The more I looked at the pictures, the more I decided that it was simply too crooked. In this sort of rug, a certain amount of leeway on the edges is to be expected. After all, it's made of circles. However, this one is unacceptably crooked. So I'll probably be adding a few more pieces to it, then taking the pictures again. I'll let you know how it turns out. This one will be up for grabs in my Etsy shop once I'm satisfied with how it looks.


Sunday, July 1, 2012

American Flag Miniature Rag Rug

Inspired by July 4th coming up in a few days, I decided to make a little tribute of my own: this adorable little flag made in the style of a rag rug.

What You'll Need:

  • red, white, and blue fabric strips
  • buttons
  • red, white, and blue thread
White, Blue, and Red Fabric Ropes

Making the Flag:

1. Make Fabric Ropes.

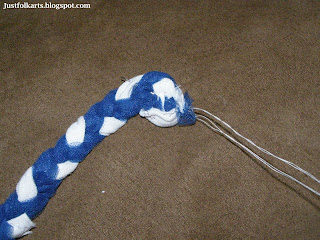
Yesterday I posted a tutorial on making fabric ropes (Rapunzel hair) here. For this project, you will need to have like colors. Use only the white strips for a white rope, blue strips for the blue rope, red strips for the red rope. Since this one is so small, I recommend sticking to the same shade of each color as much as possible. For example, don't mix sky blue and navy blue on this one.

2. Check the Layout. 

Decide on the approximate size you want your rug to be. Mine is 8 3/4" wide and 6 1/4" long. I did add a little more red to the end of this rope. As you can see at the bottom of the picture, I didn't quite have enough.

3. Cut the stripes.

Normally, I have a diagram and make excessive measurements. This time I didn't (and yes, I paid the price, I had to trim down my blue section and even then I wasn't entirely happy with the length of it). I made 4 short red stripes, 3 short white stripes, 3 long red stripes, and 3 short red stripes.

To make the stripes from the rope, sew a length of same-colored thread through all three pieces of a section of the fabric braid. Then wrap the thread tightly around the braid several times. Finish by sewing underneath the wrap and knotting. Repeat about 2 inches away. Then cut between the sewn sections. In the picture, I left a gap of about 3/4", which was fine for this section, but when the flag was finished, I would have liked to have had some excess on the sides to trim away.


4. Make the Blue Section.

To make the blue section, lay the end of the fabric rope flat on a surface. Keeping the rope flat, gently turn it at the desired length and run parallel to the end. Use same-colored thread to sew back and forth between the two parts and attach them together. You can use pins to hold the rope in place. Continue to snake the rope back and forth until you have a square-shaped section.

5. Assemble the pieces.

 Lay out the pieces of your rug as shown. We'll be working on the reverse side so the stitches aren't visible from the front. I started with the short stripes first and sewed them together, adding one more at a time.

Then I attached the blue section to the long white stripe using blue thread. 
 Then I attached the blue section to the ends of the short stripes, then the long white stripe to the short red stripe. From there, I continued to add long stripes until I had used all of them.

 6. Add the stars.

Although I would have loved to have done 50 tiny stars, I simply couldn't find any. Also, we're aiming for cuteness instead of accuracy. I had bought some star buttons just for this project, but didn't like the way they looked. So I raided the button stash and came up with a few options. Maybe you would have chosen differently than I did.
Circle and Square White Buttons

Small and Very Small White Buttons

Medium and Large White Buttons

Yellow Stars


 I chose the small round white buttons and used navy thread to attach them.

7. Attach a Wooden Rod for Hanging.

You can use a dowel rod, or nab a wooden skewer from your kitchen. On the reverse side, carefully work the rod through some of the red braided loops. Then trim the rod to just under the width of the flag. Sew the other end to the blue section using navy blue thread.


8. Hang and Enjoy!

Just in time for 4th of July! 


 This little flag enjoyed its time on our wall, but it's ready for a permanent home. Maybe yours? As of publication, this flag is up for sale on my Etsy shop. Check it out here  or visit my Etsy Store.